Halloween rock painting ideas are such a lovely way to get creative for the spooky season, especially when you want a Halloween craft that doesn’t need a cupboard full of supplies or hours of complicated painting.
You can make them cute, creepy, colourful or wonderfully simple, and imperfect lines honestly add to their handmade charm. Paint a little collection for your Halloween decor, make them with the kids, add them to autumn displays, or tuck a few around the garden for people to discover.
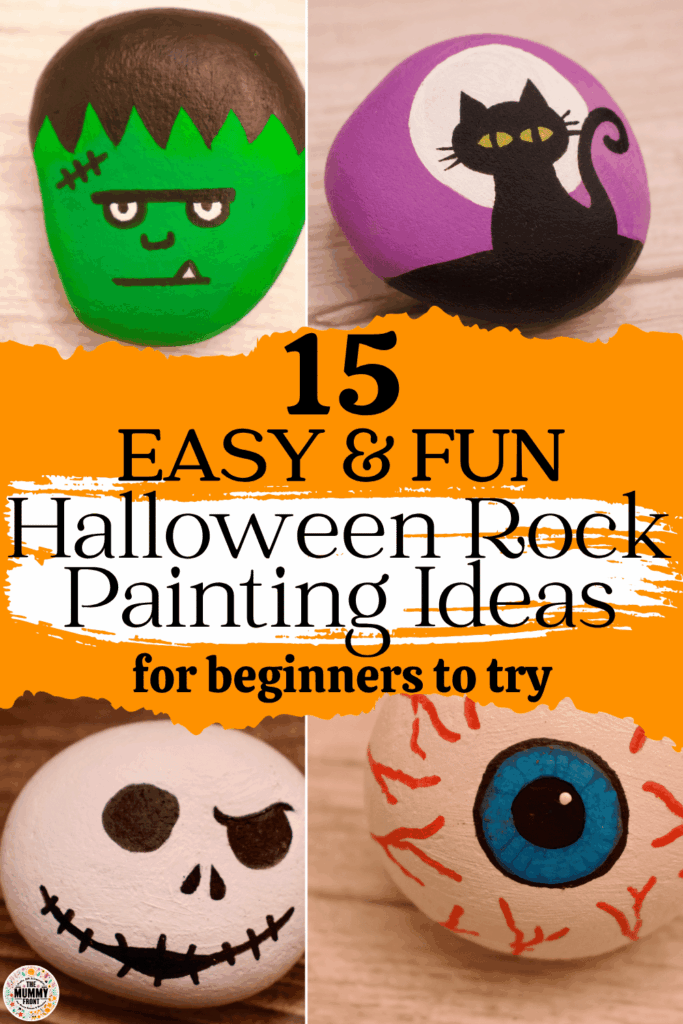
I’ve put together 15 painted rock ideas below, ranging from very easy designs such as candy corn to slightly more detailed Halloween characters. You definitely don’t need to be an artist for these either. Most of them are built from simple shapes, bold colours and a few little details that bring everything to life.
P.S. Don’t forget to click here to save these Halloween rock painting ideas to Pinterest for later

A Few Tips Before You Start Painting
Smooth, fairly flat stones are usually easiest to work with, particularly for designs with faces or fine details. Give them a quick wash first and let them dry completely before painting.
Acrylic craft paint works beautifully for larger areas, while paint pens can make eyes, outlines and tiny details much easier. If your first coat looks patchy, don’t keep working at it while it’s wet. Let it dry and add another thin coat instead.
And if you’re planning to put your Halloween painted rocks outside, finish them with a suitable clear outdoor sealant once everything is completely dry.
Now for the fun part.
1. Create a Black Cat Under a Halloween Moon
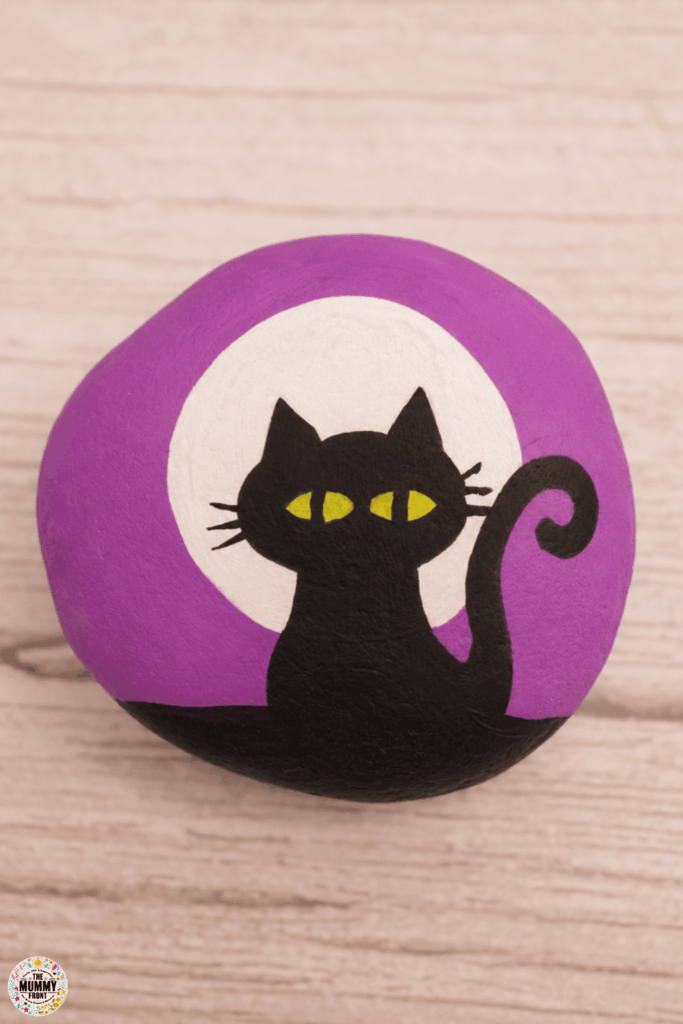
A black cat against a bright full moon has that classic Halloween look without needing lots of fiddly detail. Paint the rock purple first, add a large white moon and then layer the black cat silhouette over the top.
The curled tail is what really gives this one personality, so don’t worry about getting every line perfectly symmetrical. A pair of yellow-green eyes adds just enough colour to make the cat stand out.
2. Cover a Rock in Tiny Halloween Ghosts
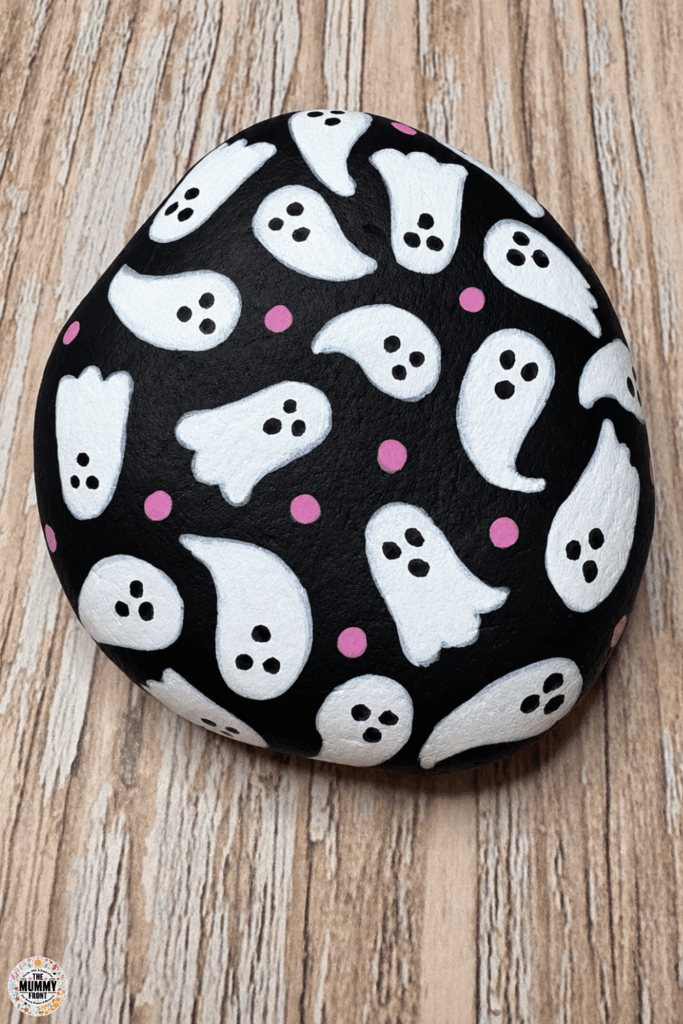
Instead of painting one large design, turn the whole rock into a mini Halloween pattern.
Start with a black base and scatter small white ghosts across it, changing their shapes and directions so the pattern feels playful rather than too uniform. Tiny pink dots break up the black and white beautifully and give the finished rock a slightly sweeter feel.
This is also a great design for a large, flat stone because you have plenty of room to keep adding little ghosts.
3. Wrap Up a Simple Mummy Rock
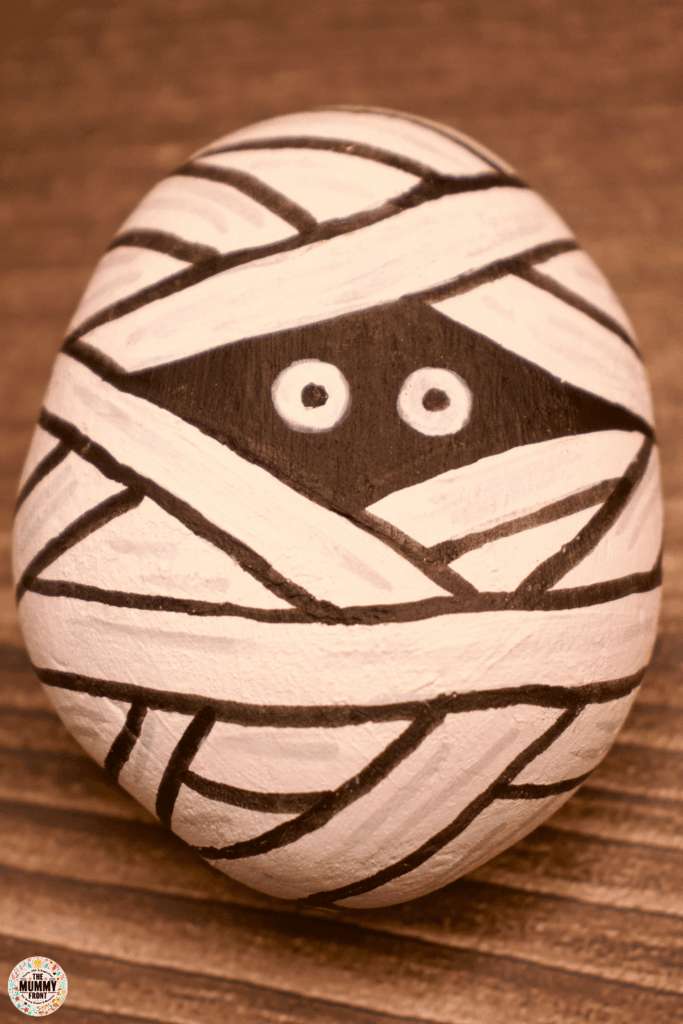
A mummy is one of those Halloween rock painting ideas that looks much more detailed than it actually is.
Start with a pale base, then draw overlapping bandage strips across the rock, leaving a black gap for the face. Two wide eyes peeking through are really all you need.
Try letting some of the bandages run right off the edges of the stone. It makes the design feel as though the mummy is completely wrapped rather than simply drawn on the front.
4. Paint a Classic Jack-O’-Lantern
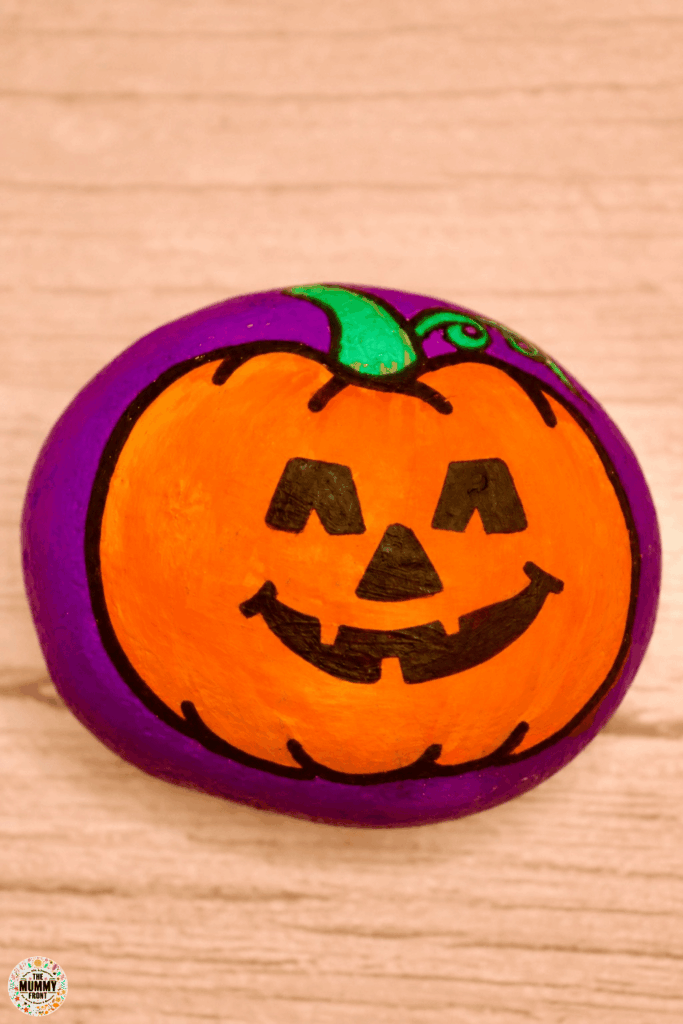
You can’t really have a collection of Halloween rocks without a cheerful pumpkin somewhere in the mix.
The purple background makes the bright orange pumpkin pop, while the black jack-o’-lantern face keeps everything instantly recognisable. Add a green stalk and a little curling vine at the top for an extra detail that makes the design feel finished.
You could easily change the expression too, from happy and friendly to something much spookier.
5. Make a Funny Frankenstein Rock
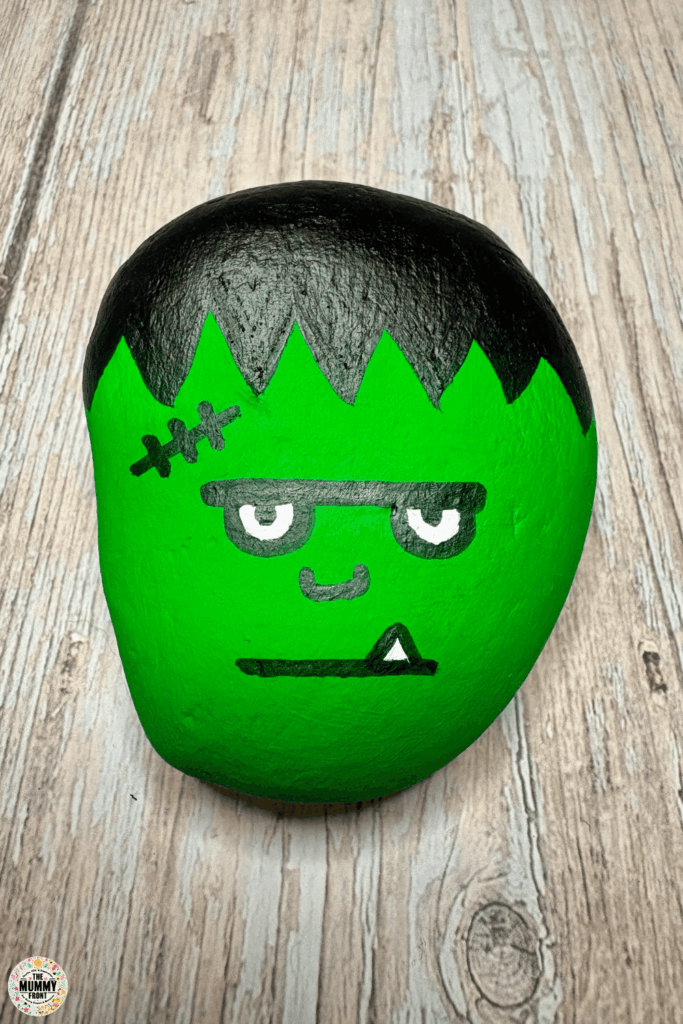
Frankenstein-inspired designs work particularly well on slightly square or chunky stones because the natural rock shape already gives you that wonderfully blocky head.
Paint the face bright green, add jagged black hair and finish it with heavy eyebrows, sleepy eyes and a little scar. The expression doesn’t need to be complicated. In fact, the slightly unimpressed face is part of what makes this one fun.
A tiny tooth peeking out at the bottom is a sweet finishing touch.
6. Create a Cute Blushing Ghost
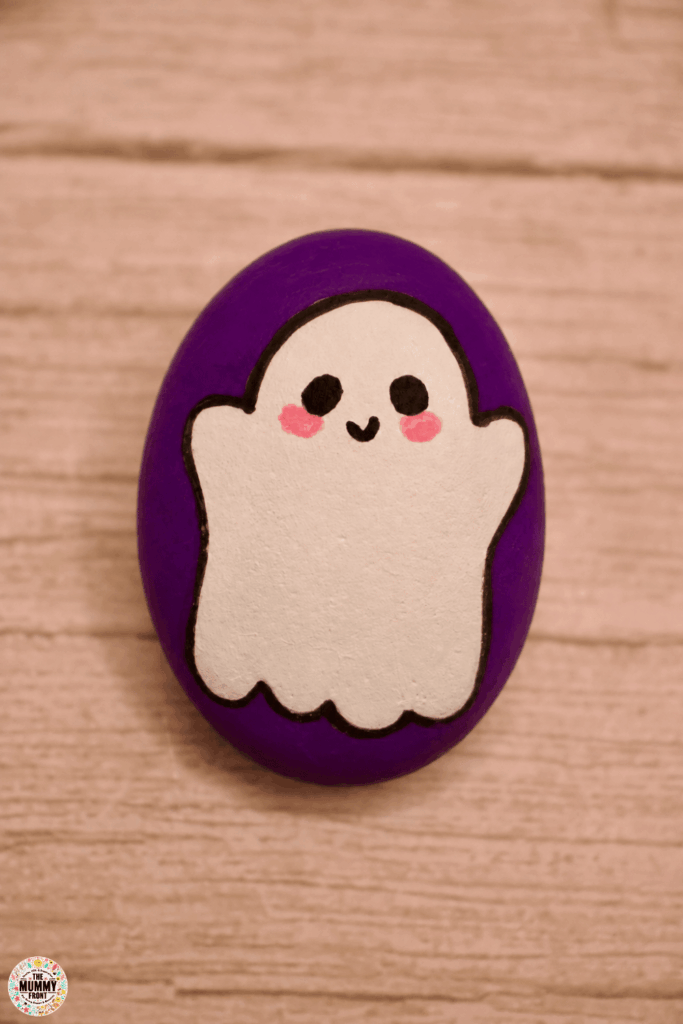
Halloween doesn’t always have to be scary.
For a softer Halloween rock, paint a simple white ghost onto a purple background and give it round black eyes, rosy cheeks and a tiny smile. The scalloped bottom keeps the ghost shape easy to paint while still looking really cute.
This would be a lovely one for younger children to copy because the basic ghost shape is so forgiving.
7. Paint a Creepy Bloodshot Eyeball
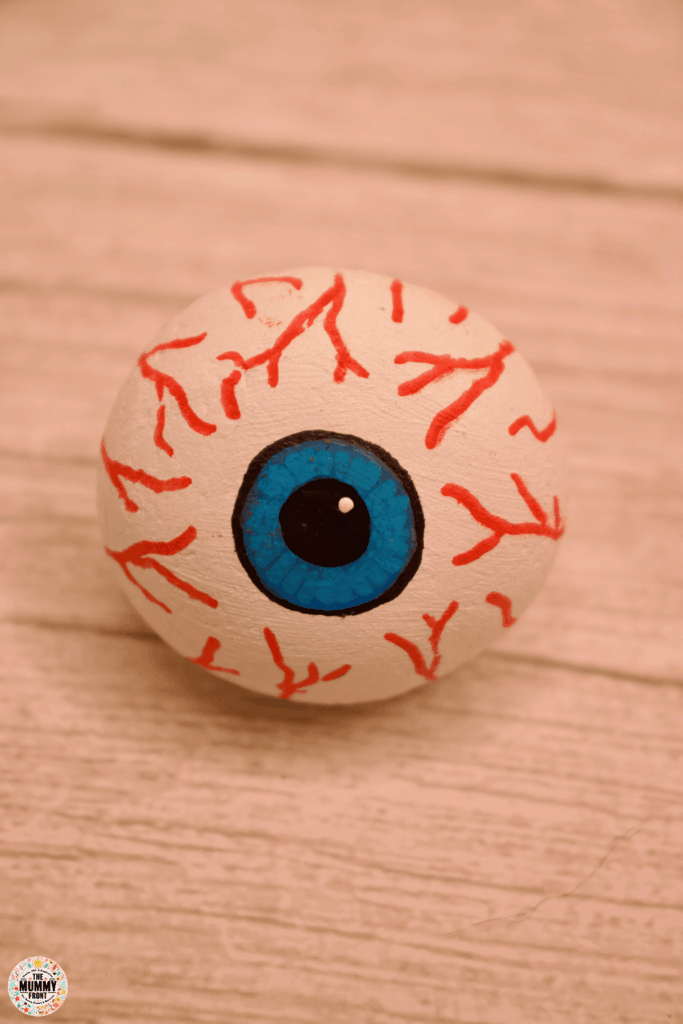
If you want something a little more gruesome among the cute designs, an eyeball is wonderfully effective.
Paint the entire stone white before adding a large coloured iris and black pupil in the centre. Then use a thin brush or paint pen to draw uneven red veins travelling towards the eye.
Don’t try to make the veins perfectly neat. Their irregular shape is exactly what makes the finished eyeball look suitably creepy.
8. Give a Pumpkin a Witchy Twist
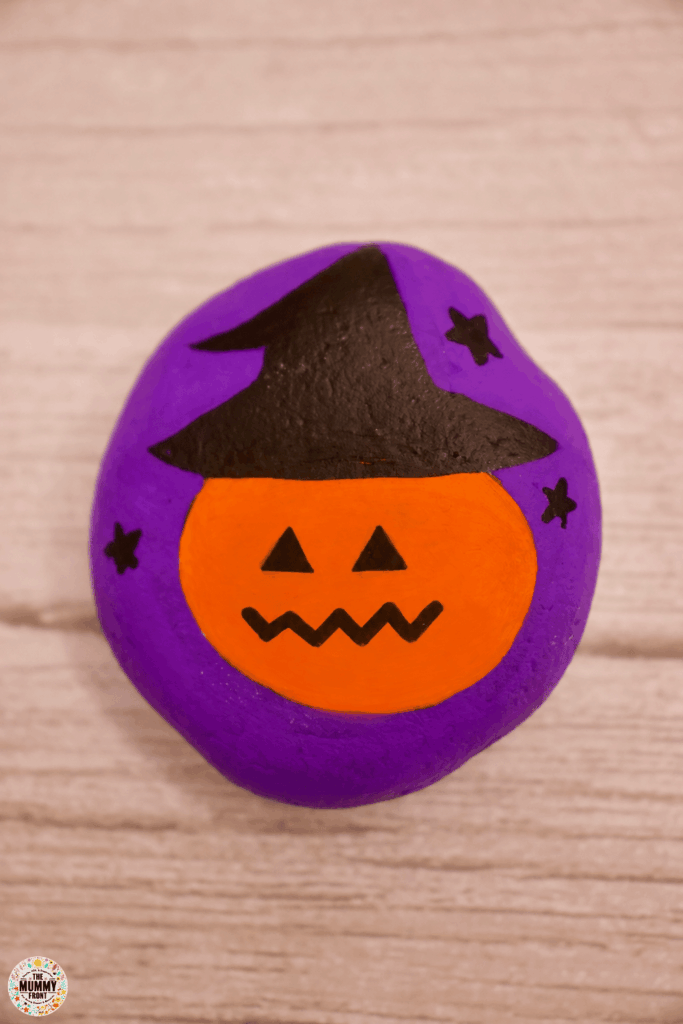
Combine two Halloween favourites by putting a floppy witch’s hat onto a pumpkin.
The bright orange pumpkin is simple enough to paint, so you can spend a little more time adding the oversized black hat and a few scattered stars around it. A jagged mouth rather than a traditional pumpkin smile gives this one a slightly different character too.
Purple makes a brilliant background for these classic Halloween colours because both orange and black stand out beautifully against it.
9. Add Striped Legs to a Witch Rock
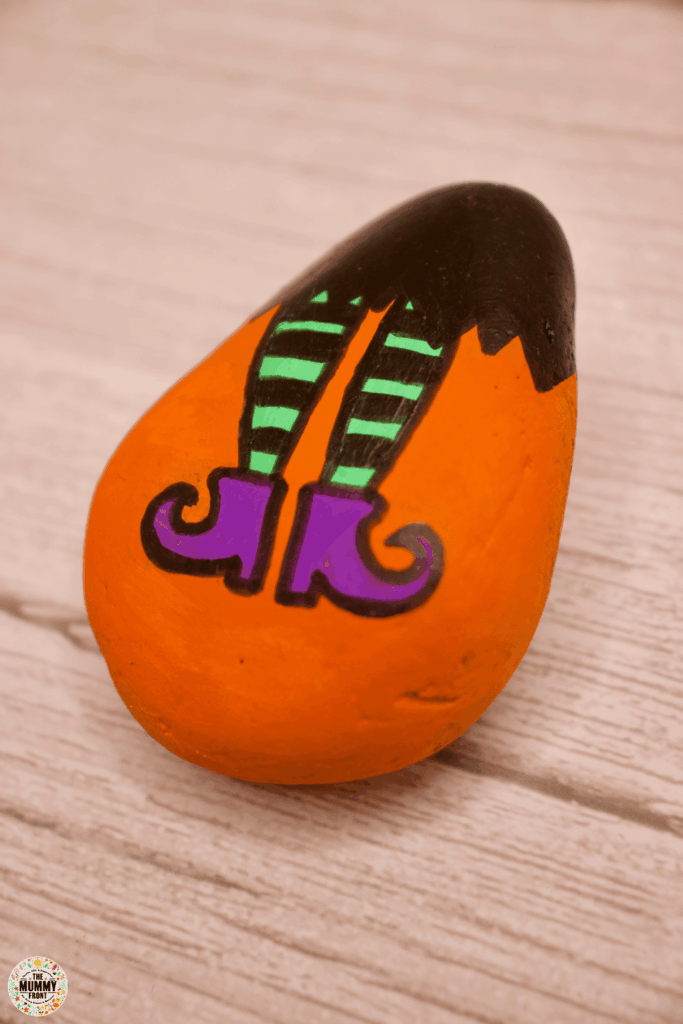
You don’t need to paint an entire witch to make a design that instantly feels Halloweeny.
A pair of striped tights and curly purple boots peeking out beneath a black dress creates a fun little witch without needing to worry about painting faces or hands. The bright orange background makes the green and purple details stand out even more.
This is a lovely design if you enjoy doodle-style painting because you can play around with different sock colours, buckles, boots and patterns.
10. Paint a Spooky Jack Skellington Inspired Rock
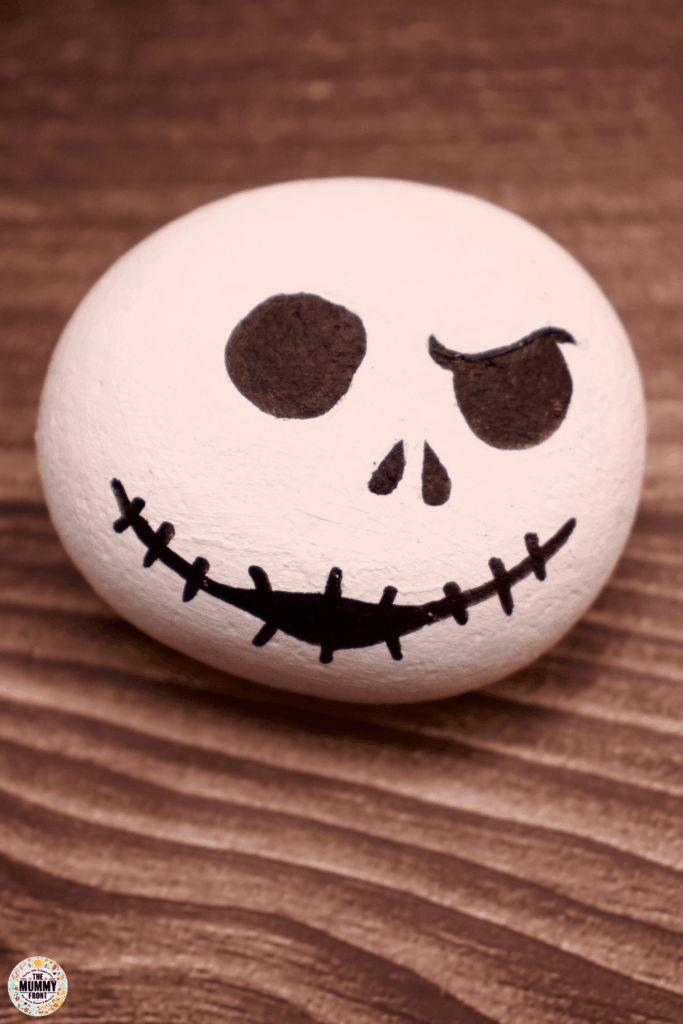
For something a little darker, turn a pale rock into a simple stitched Jack Skellington face.
Large uneven eyes, tiny nostrils and a long stitched smile are enough to create the whole face. One raised eyebrow gives the skull a slightly mischievous expression without adding much extra work.
This design is especially beginner-friendly because it only uses a couple of colours and actually looks better when the features aren’t perfectly symmetrical.
11. Turn a Pebble Into Candy Corn
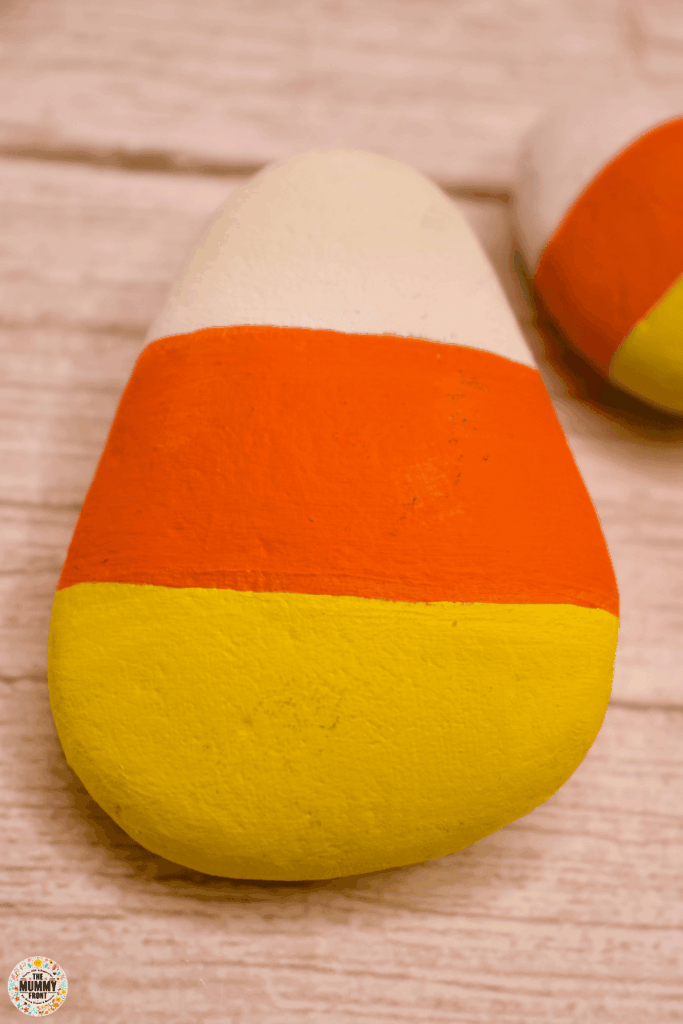
Sometimes the simplest painted rocks are the most effective.
Choose a naturally triangular or tapered stone and divide it into the familiar white, orange and yellow candy corn sections. There are no outlines, faces or tiny details to worry about, which makes this one particularly easy to paint.
A small group of candy corn rocks would look really cute scattered through an autumn table display or gathered together in a little bowl.
12. Make a Little Ghost in a Witch Hat
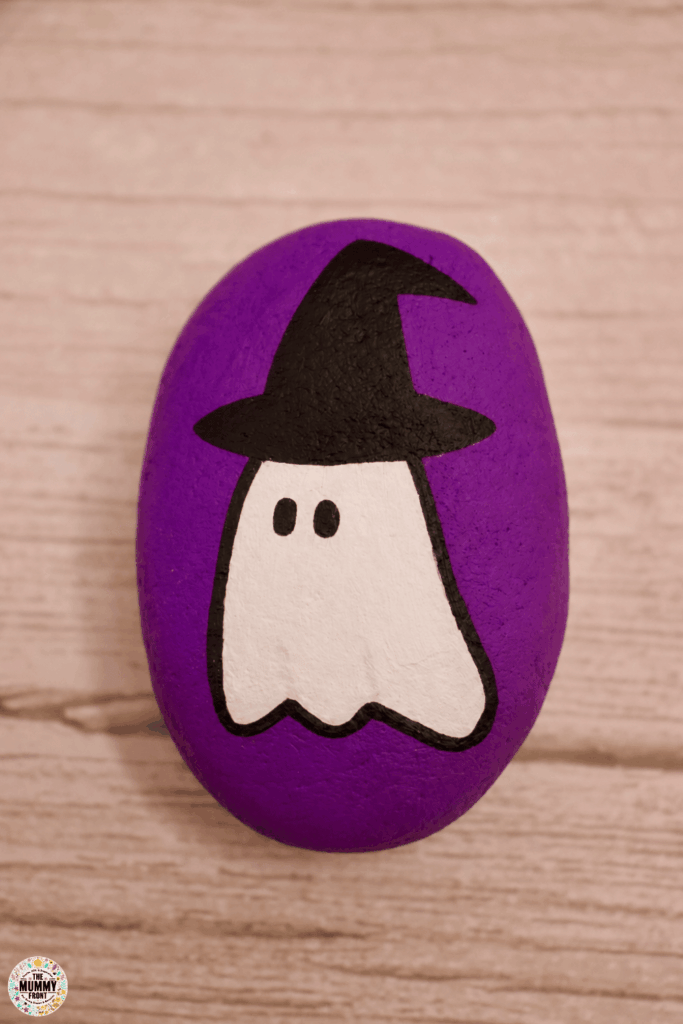
Give a simple ghost an instant Halloween upgrade with an oversized witch’s hat.
Paint the background purple, add the white ghost shape and finish it with a floppy black hat stretching across the top. Two tiny oval eyes are all the face needs.
I love designs like this because they’re so easy to adapt. Add pink cheeks for a sweeter ghost, little stars around the hat or even a miniature pumpkin beside it.
13. Create a Mini RIP Gravestone
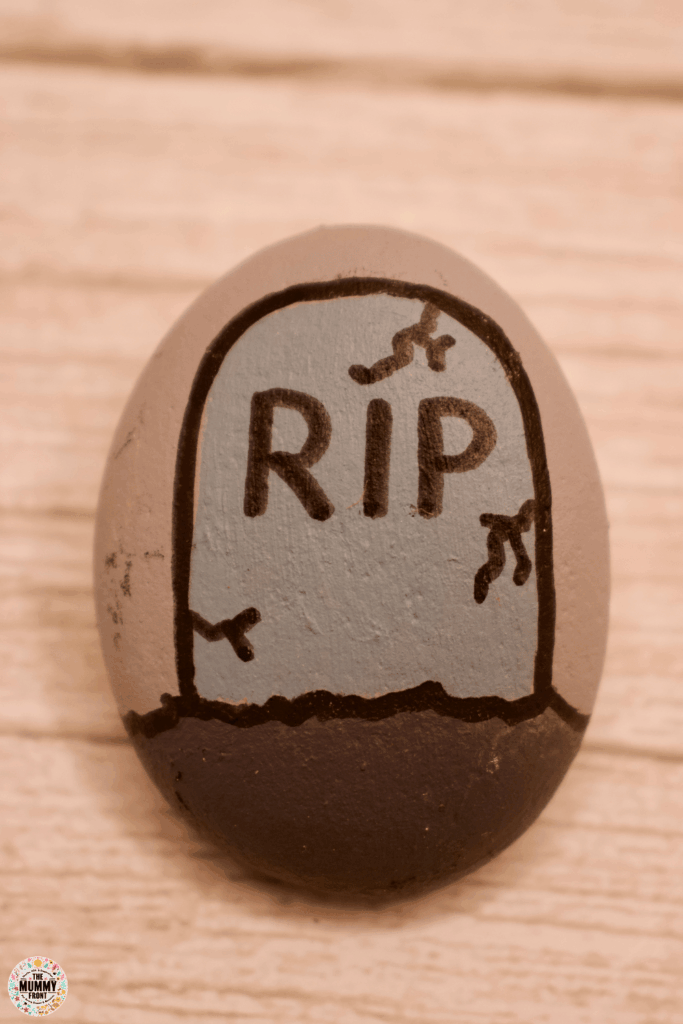
An oval stone can easily become a tiny Halloween gravestone.
Paint the headstone shape in grey, add a dark base for the ground and outline everything in black before adding a simple RIP message. Small cracks around the edges make the stone look older without requiring any complicated painting.
This would be particularly fun as part of a group display with ghosts, pumpkins and mummy rocks to create your own miniature painted-rock graveyard.
14. Paint an Easy Candy Corn Pattern
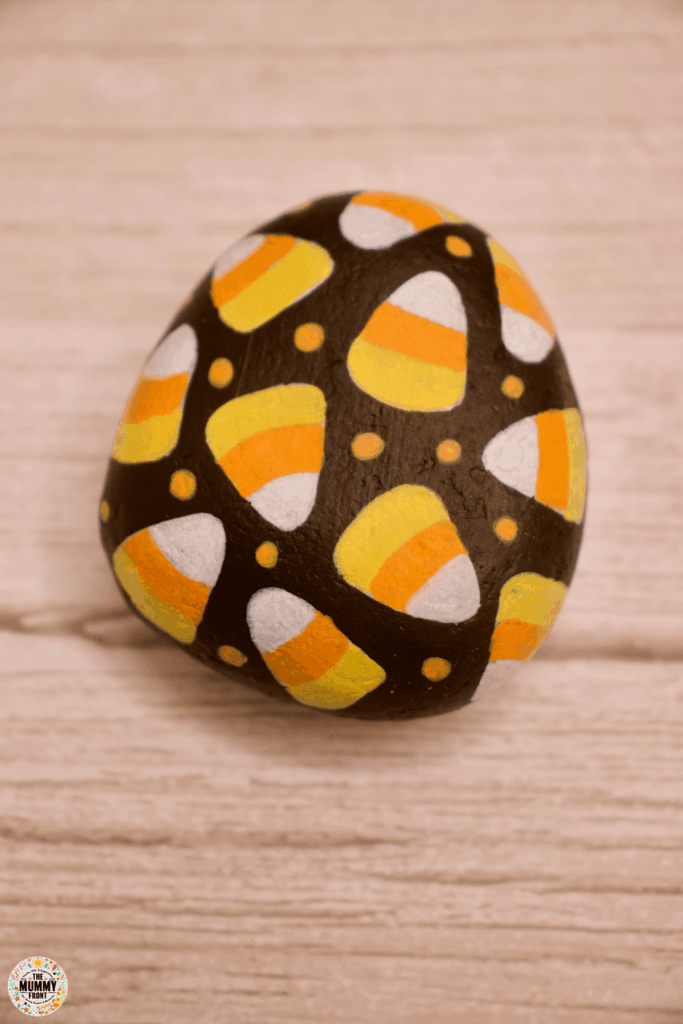
If you enjoyed the single candy corn rock, take the idea one step further and turn it into a repeating pattern.
Start with a black base and scatter little white, orange and yellow candy corn shapes across the surface. Tiny yellow dots between them help fill awkward gaps and make the whole design feel more balanced.
The nice thing about pattern rocks is that there’s no obvious centre to get right. Just keep adding shapes until the stone feels full.
15. Make a Sweet Pink Ghost Pattern
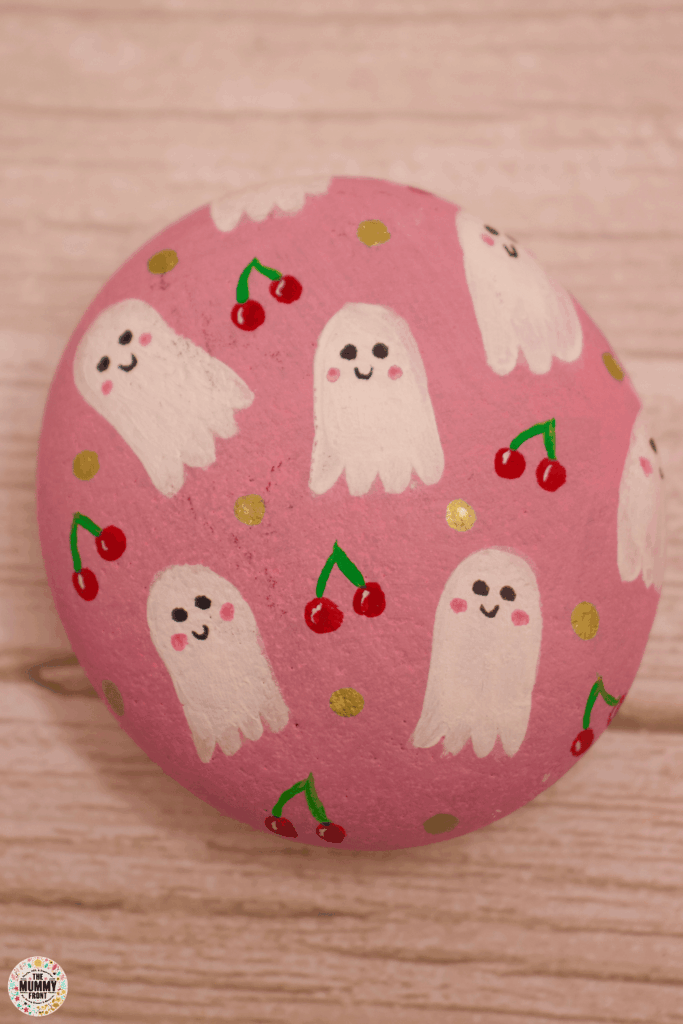
For a completely different take on Halloween colours, swap the traditional purple, orange and black for soft pink.
Paint little white ghosts across the rock, giving each one tiny eyes, rosy cheeks and a smile. Cherries and metallic-looking dots add a fun unexpected detail and make the whole design feel more like a cute Halloween print.
It’s proof that spooky season doesn’t have to mean sticking rigidly to traditional colours. If your style is softer or more colourful, bring those shades into your Halloween crafts too.
Before You Go...
Before You Go...
The nicest thing about these Halloween rock painting ideas is how easy they are to make your own. You can copy the designs closely, change the colours, simplify the details or use the shape of each stone to inspire something completely different.
Start with one or two of the easier ideas if you’re new to rock painting, then work your way up to the patterned designs and little characters. Before long you’ll have a whole collection of pumpkins, ghosts, mummies, witches and wonderfully strange little eyeballs ready for Halloween.
And don’t worry too much about making every brushstroke perfect. These are handmade Halloween decorations, and those tiny differences are part of what makes each one lovely.
Save your favourite ideas for later, and have a look through my other Halloween crafts if you’re ready to keep the spooky creativity going.