This DIY Kitchen Chalkboard Sign project will delight you if you want to bring an adorable yet functional touch to your kitchen space.
This little craft is so fun and easy to make, you can effortlessly personalize your space whether you’re a coffee enthusiast or enjoy planning meals and decorating with adorable handmade items.
This post provides all the necessary details including supplies and step-by-step instructions so you can create your own chalkboard sign with straightforward materials…
Most of which you might already own.
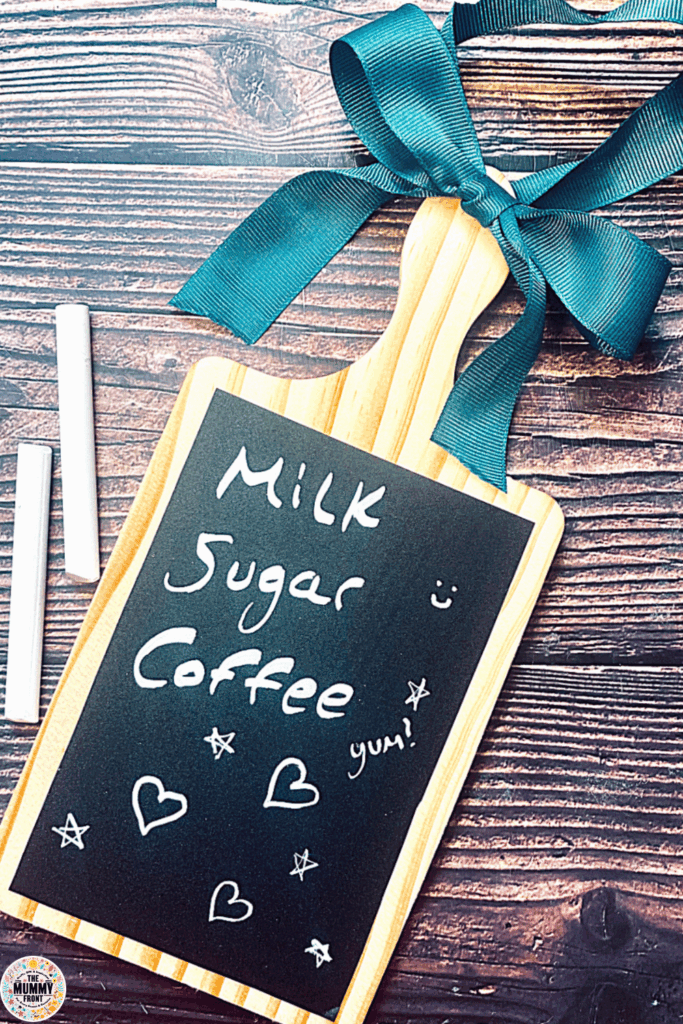
This design blends rustic appeal with ribbon details and provides a writing area for practical lists or cute little heartfelt notes.
So shall we get started?
P.S. Love this cute craft idea? Make sure you never lose it by Clicking here to easily save this tutorial to your favorite Pinterest board. Happy pinning!

This post may contain affiliate links. See my full disclosure here for more info.
Gather Your Tools & Supplies for This Charming DIY Kitchen Chalkboard Sign
Before we start creating, let’s make sure you’ve got everything ready.
Here’s what you’ll need to bring your cute kitchen chalkboard sign to life…
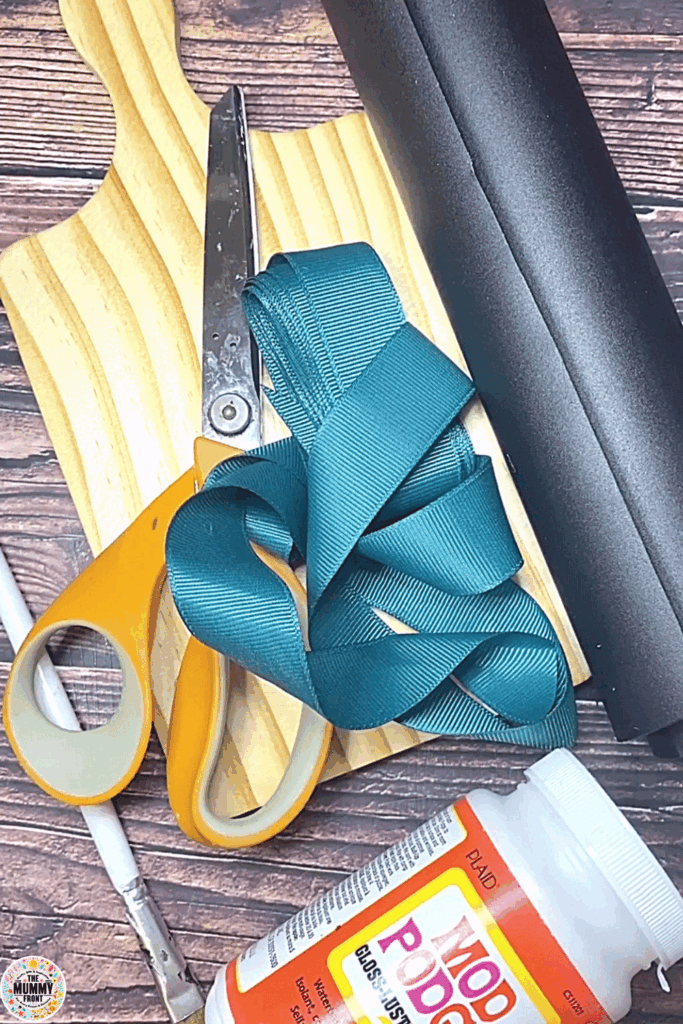
Tools You’ll Need:
- Scissors – for cutting the chalkboard paper and ribbon
- Pencil – to trace the board outline
- Paintbrush – if applying Mod Podge
Supplies to Gather:
- Wooden chopping board with handle
- Adhesive chalkboard paper
- Mod Podge – (optional) Use for extra hold if needed
- Ribbon – we used a stunning teal one
- Chalk – for writing your message or cute little doodles
How to Make Your Own DIY Kitchen Chalkboard Sign Step-by-Step
This project is super easy, and honestly, so much fun!
It’ll look adorable hanging in your kitchen or coffee corner.
Let’s do it together!
1. Measure & Cut Your Chalkboard Paper
Lay your chopping board onto the back side of your adhesive chalkboard paper.
Use a pencil to trace around it.
Then carefully cut out the shape that you want for your chalkboard area.

2. Stick It On!
Peel the backing off your chalkboard paper and slowly stick it onto the front of the board.
Smooth it down with your hands (or a ruler) to avoid bubbles and wrinkles.
Optional: If you’d like extra hold, brush a thin layer of Mod Podge under the chalkboard paper before sticking it down.
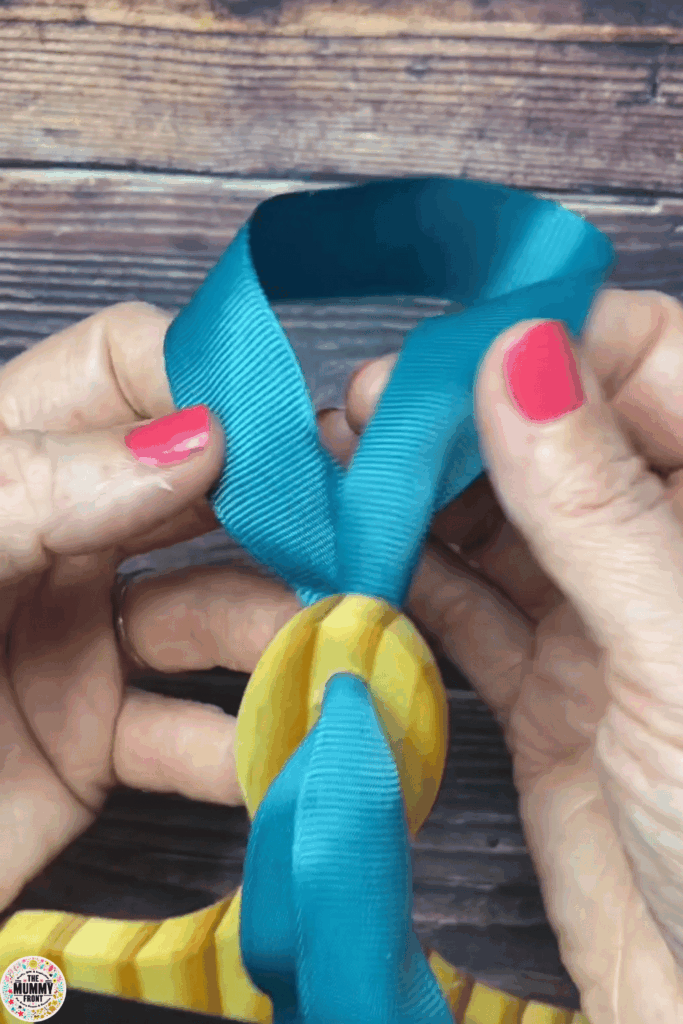
3. Add That Pretty Ribbon
Thread your ribbon through the hole in the handle and tie it into a gorgeous bow.
You can double-knot it if you want extra security.
4. Hang It Up and Enjoy
Your cute new kitchen sign is ready to hang!
Pop it on a hook or a nail in your kitchen, pantry, or even your coffee station.
5. Write Something Fun!
Now for the most fun part…
Grab your chalk and add your own message!
Whether it’s a shopping reminder, a sweet quote, or your coffee order, this is where your personality shines.

Before You Go...
And that’s it! You’ve successfully created the most adorable kitchen chalkboard sign and no doubt it looks amazing hanging in your kitchen!
This charming little sign creates a personal, welcoming feel in your kitchen whether it’s used for recording coffee orders or managing weekly meal plans.
As always, if you make this sign be sure to show me your final creation! Take a photo of your creation and tag me so I can see your work or alternatively, write about the result in the comments section below.
Make sure to subscribe so you won’t miss future DIY projects and creative seasonal projects.
You will find something fresh and creative to explore every time you visit here!