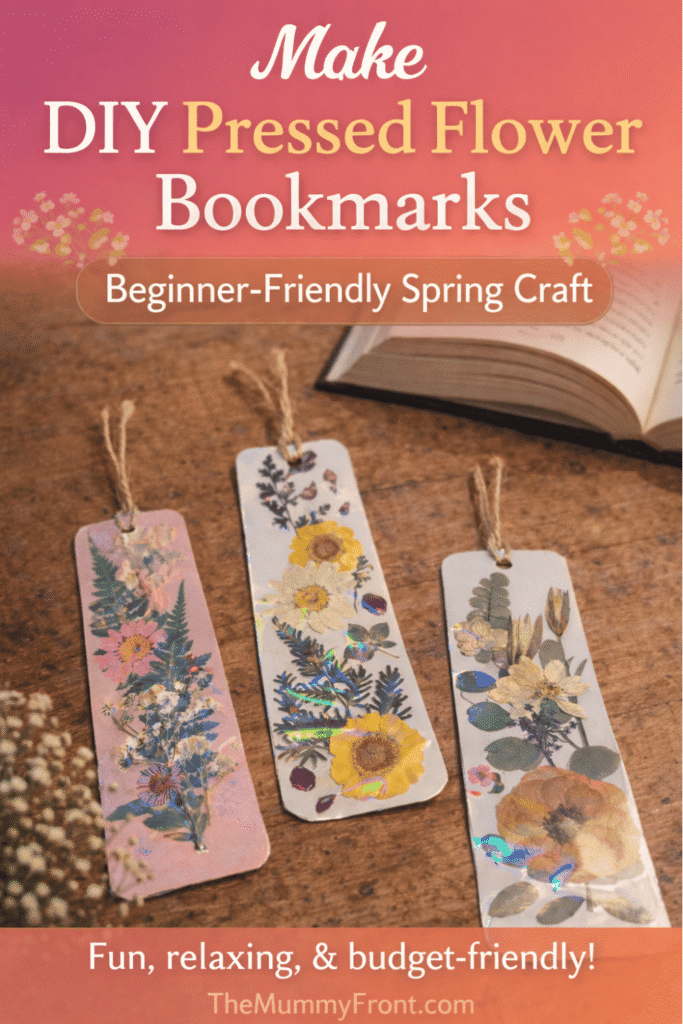
DIY pressed flower bookmarks are one of those projects that transform everyday items into something beautiful, useful, and handmade. If you’re after an easy craft to work on this weekend that feels low stakes, relaxing, beginner-friendly, and inexpensive, this is a sweet project to dive into. You can whip up these cute little bookmarks in no time at all, and they’re simple to customize and great if you’re in the mood to spend a few creative hours on a rainy weekend.
P.S. Don’t forget to click here to save this DIY pressed flower bookmark tutorial to Pinterest
This post may contain affiliate links. See my full disclosure here for more info.
Materials
- Pressed flowers
- Cardstock in whatever colour you like
- Clear laminate OR clear tape
- Self-adhesive laminate sheets
- Glue stick
- Twine
- Hole punch
- Scissors
- Tweezers
How to Make DIY Pressed Flower Bookmarks
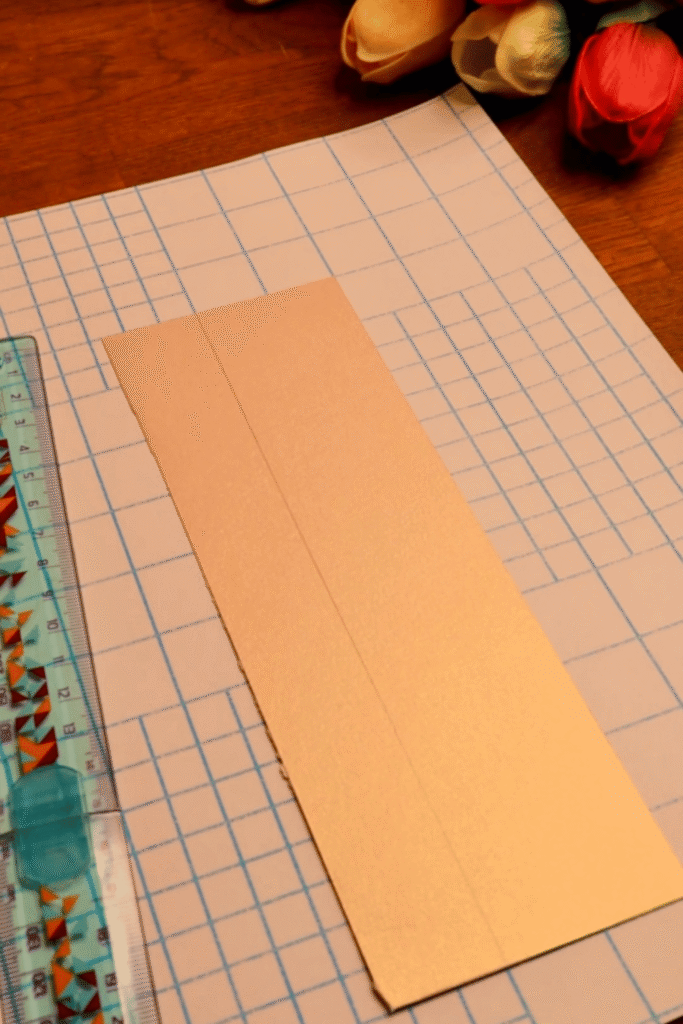
1. Make your cardstock bookmark base
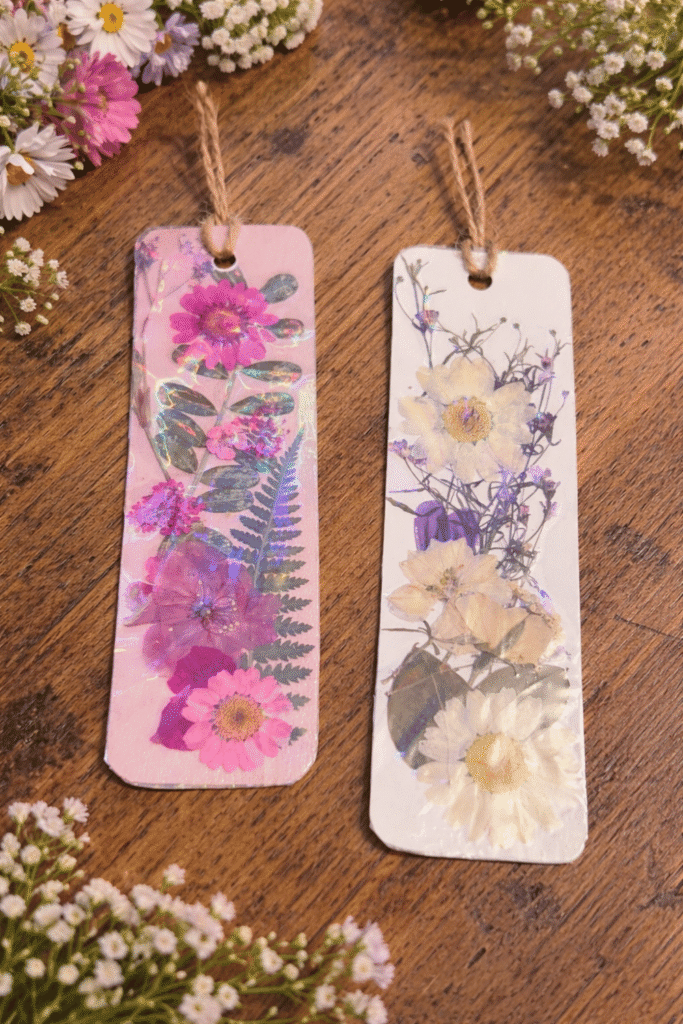
Trace the size of bookmark you’d like to make on your cardstock, then cut out with scissors. I went with white and pink cardstock, but this craft is super easy to customize with whatever colours you prefer.
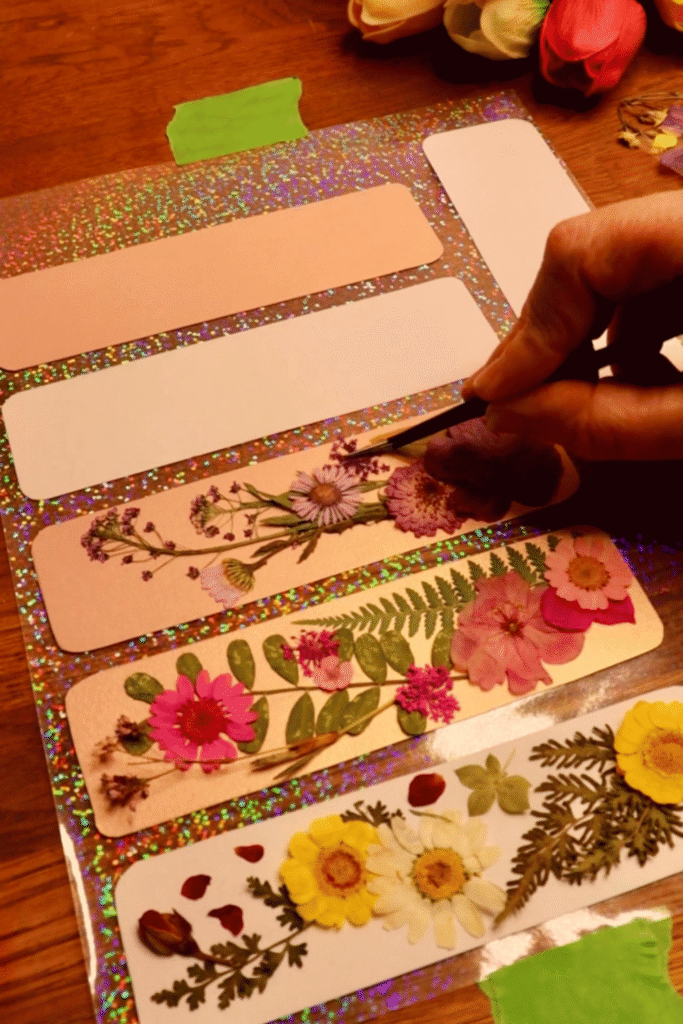
2. Arrange your pressed flowers however you like
Adhere your cardstock to the back of one sheet of self-adhesive laminate, then dot glue where you’d like your flowers to go. Use tweezers to pick up your flowers and place them gently on the glue. If you have more fragile petals or shorter flower stems, I highly recommend using tweezers for this step.
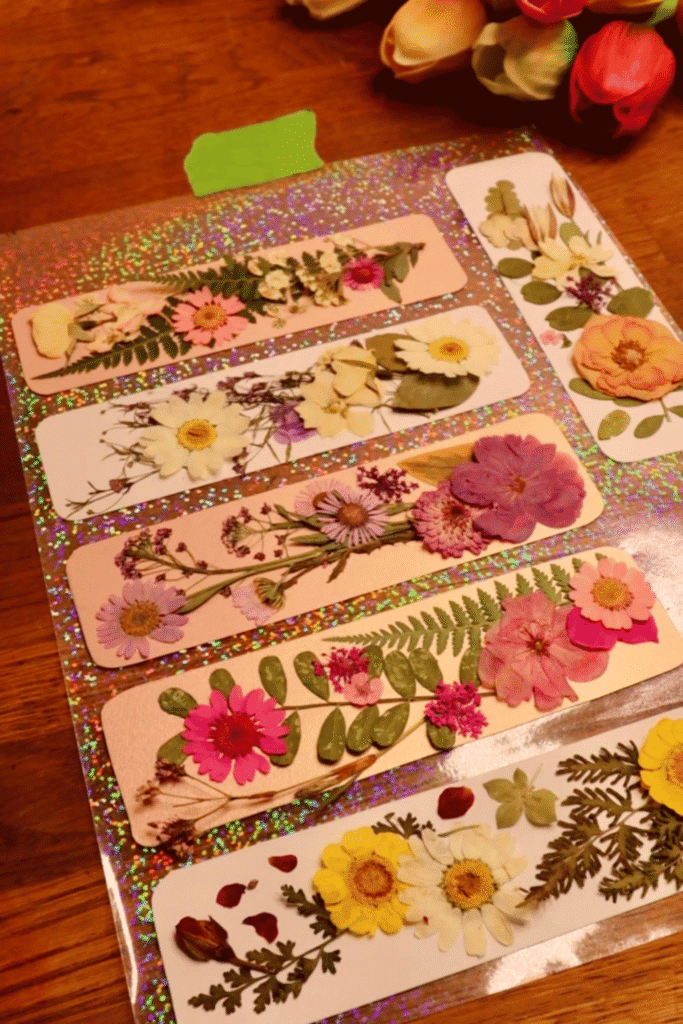
3. Place delicate flowers using this hack
Because some of the flowers I used were so delicate, I found this hack made things infinitely easier. I’d scrape a little glue onto the opposite end of my tweezers, then scoop up the flower with the tweezers and glue. From there, I pressed the flower onto the bookmark, held it there with my finger, and slowly pulled the tweezers away which helped prevent everything from moving.
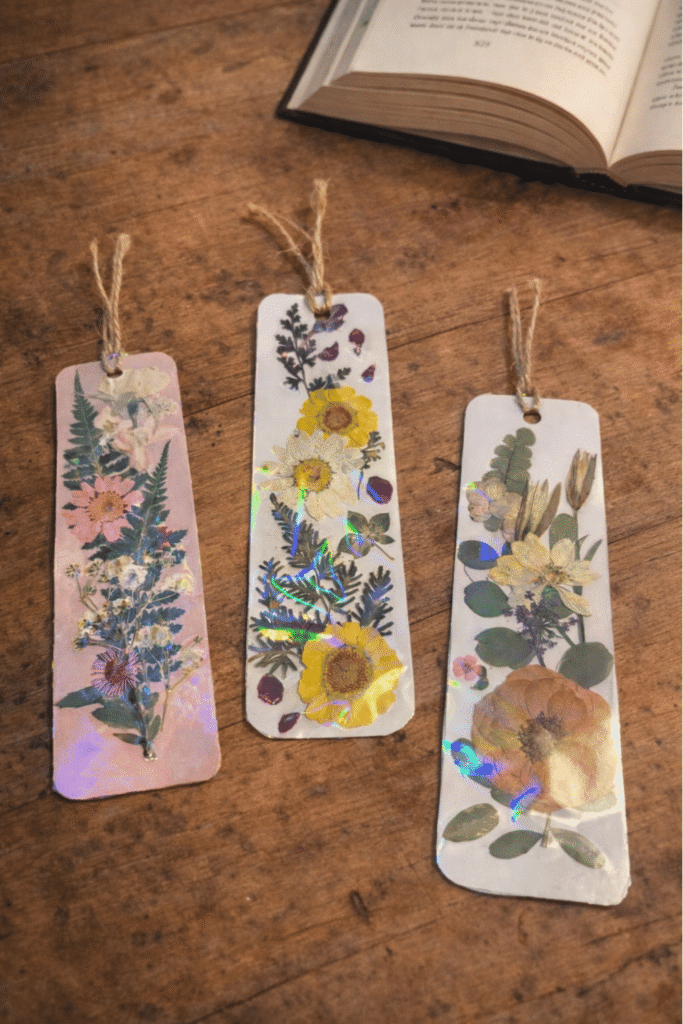
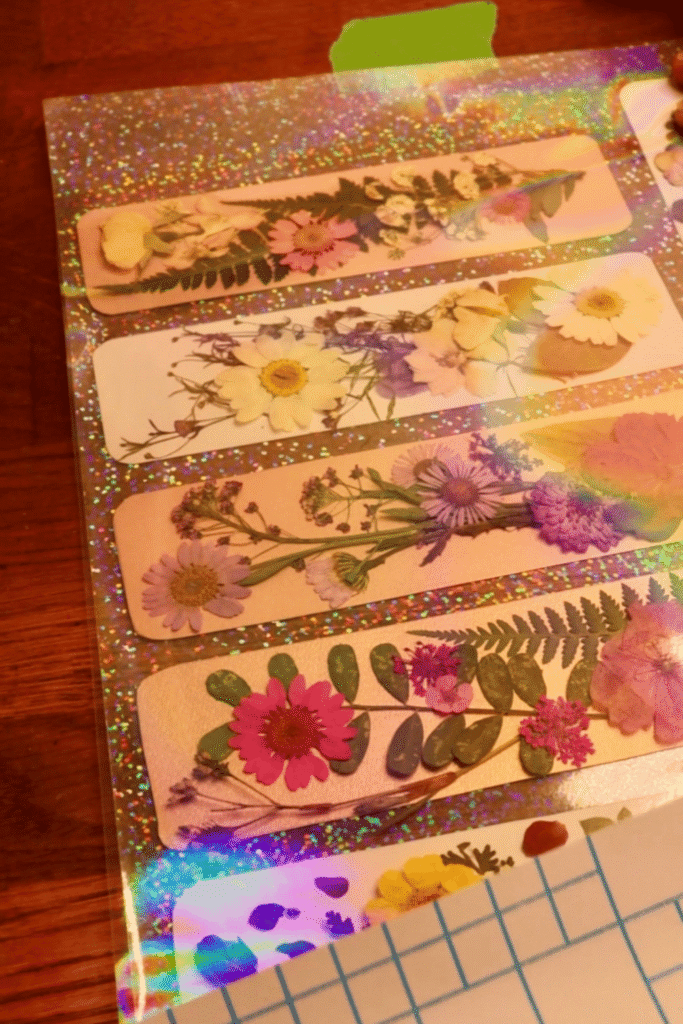
4. Laminate to seal your flowers in place
When you’re happy with how your flowers look, place your other sheet of laminate on top to seal everything in. As I mentioned, I used self-adhesive laminate sheets. But you can use clear tape or another clear laminate sheet if you prefer… whatever you already have on hand is great.
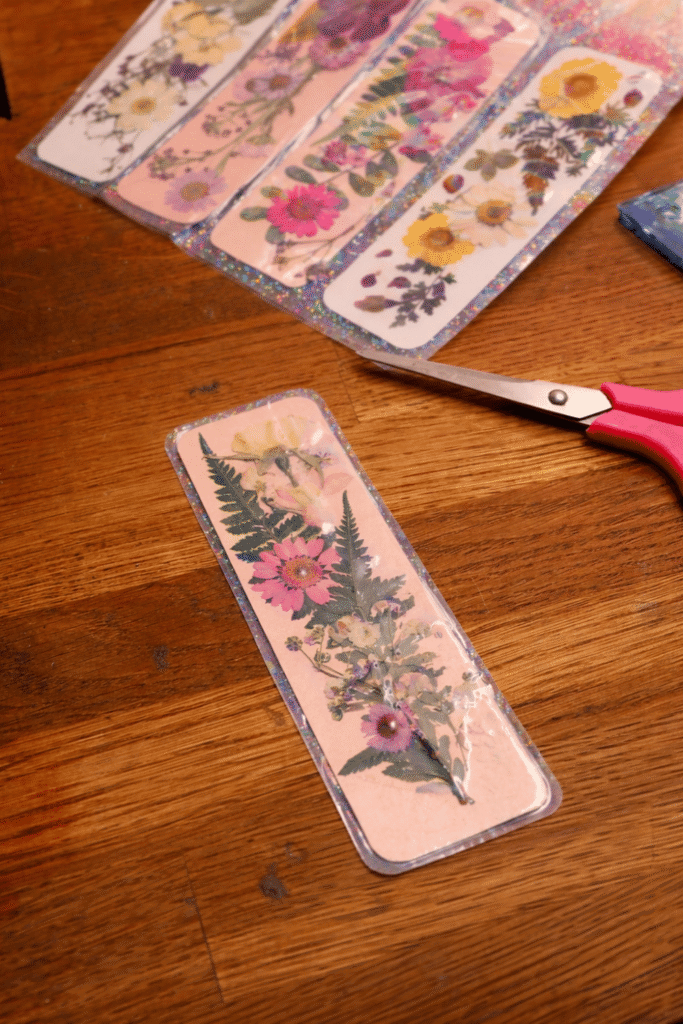
5. Trim around your bookmark shape
Use scissors to trim around the edges of your bookmark, leaving a border around the edges or cutting right up to the card line if you want that clean cut look. This is what really makes your flowers pop and gives your bookmark that nice handmade vibe.
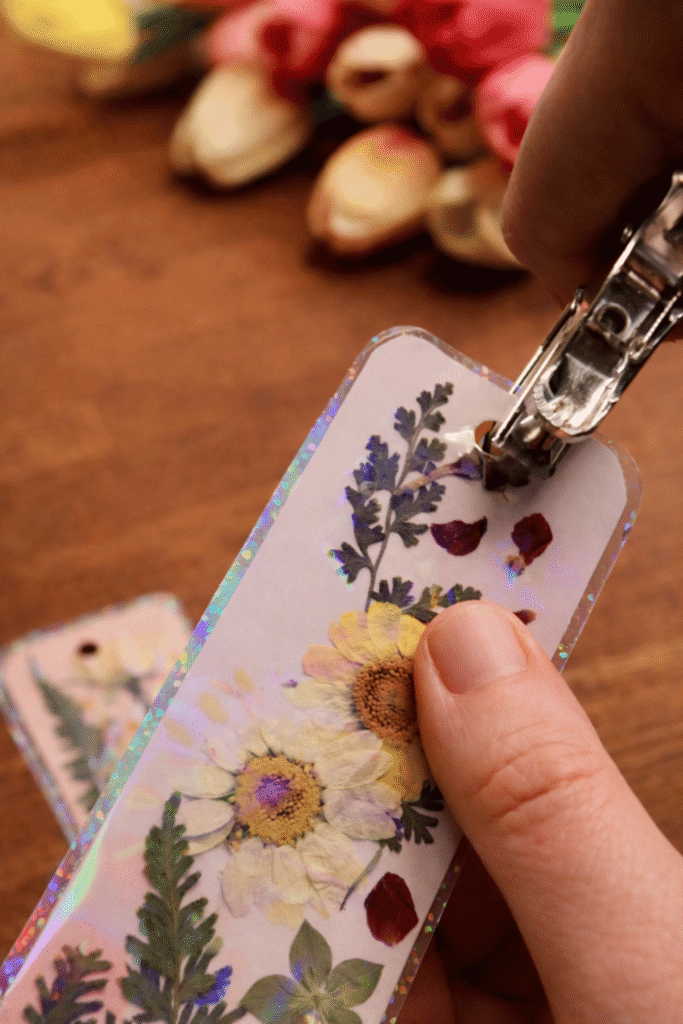
6. Add twine to finish them off
Lastly, punch a hole at the top of your bookmark and thread your twine through. Tie it off and voila! Such a small finishing detail, but it really makes the bookmarks feel finished and ready to slide into a good book.
A few of my tips and tricks…
As with any DIY crafting project, work at your own pace. I find with delicate pressed flowers it’s better to go slow so you don’t ruin your flowers. Leave yourself enough room to adjust your flowers if you need to, and remember: you don’t have to be perfect with these! Especially if you’re new to working with pressed flowers. Part of what makes these so charming is that handmade, Etsy-finds sort of vibe. Don’t fret about making your flowers line up perfectly or adding too many. There are no rules!
Before You Go...
I adore these DIY pressed flower bookmarks. They feel special, but aren’t difficult or time consuming. You can totally customize them, and they’re such a cute way to use pressed flowers in a project that you’ll actually enjoy using. Make a few for yourself, or make a bunch to gift. Whatever you decide, I hope you’ll revisit this easy spring tutorial anytime you’re in need of a calm and creative craft to work on.