This adorable felt Santa ornament is the perfect craft for the holidays! Don’t you just love how cute Santa looks with his legs poking out of the mini plant pot?
Make this quick and easy felt Santa ornament to hang on your Christmas tree or as the perfect handmade gift idea… He would even be a fantastic craft to make and sell this Christmas!
Be sure to click here or on the image below to quickly and easily save this adorable Felt Santa Ornament to your favorite Pinterest Christmas board

This post may contain affiliate links. See my full disclosure here for more info.
To make this craft even easier, you can use our free template found inside our member’s resource area! Simply sign up using the box below and I’ll send the template over to you…

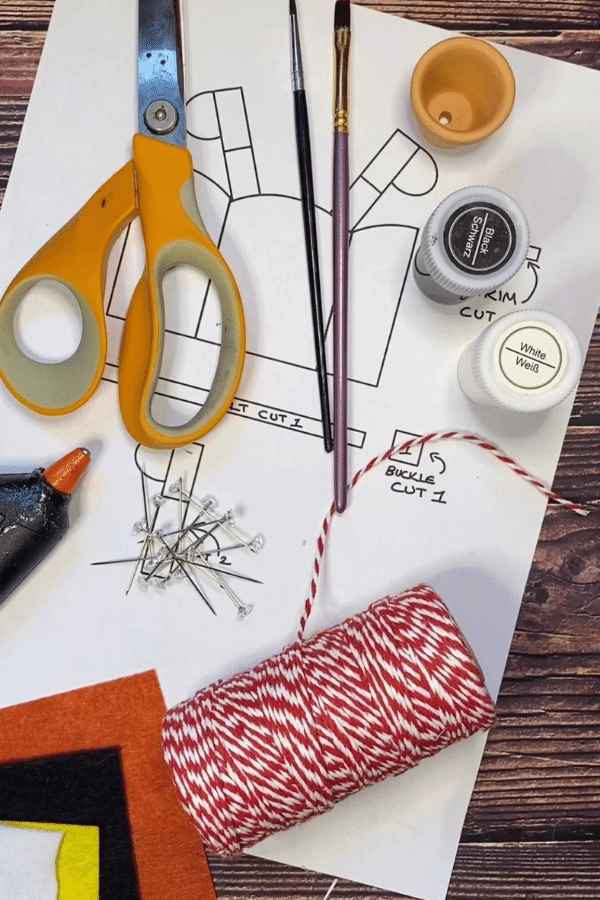
Supplies Needed To Make This Adorable Felt Santa Ornament
Tools
- Glue Gun
- Scissors
- Paintbrush
- Pins
- Template (use the box above to sign up and get your FREE template)
- Printer
Materials
- Red, Black, White, and Yellow Felt
- Black and White Acrylic Paint
- Festive String
- Mini Terracotta Pot
- Stuffing
Love this easy Christmas tree ornament craft? You can find this one and many other fantastic crafts over in our ebook… Check it out here on Amazon!
Watch The Video First

Adorable Felt Santa Ornament
This adorable felt Santa ornament will look amazing hanging on your Christmas tree or you can even make it as the perfect handmade gift!
Materials
- Red, Black, White, and Yellow Felt
- Black and White Paint
- Festive String
- Mini Terracotta Pot
- Toy Stuffing
Tools
- Glue Gun
- Scissors
- Paintbrush
- Pins
- Templates (sign up using the box at the end of this post to get your FREE template)
- Printer (for template)
Instructions
- Gather together all of your supplies

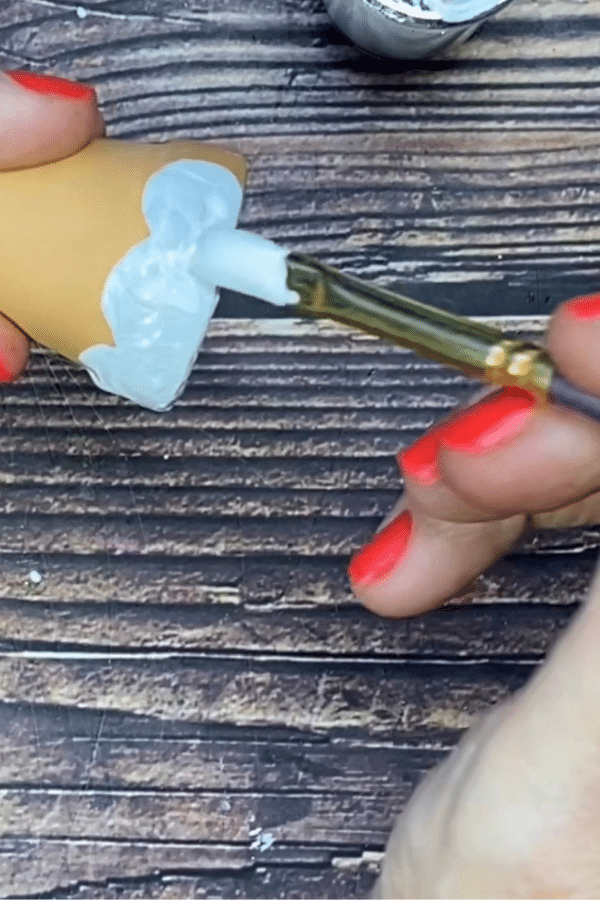
- Paint the top of your terracotta pot with white paint to create a snow effect
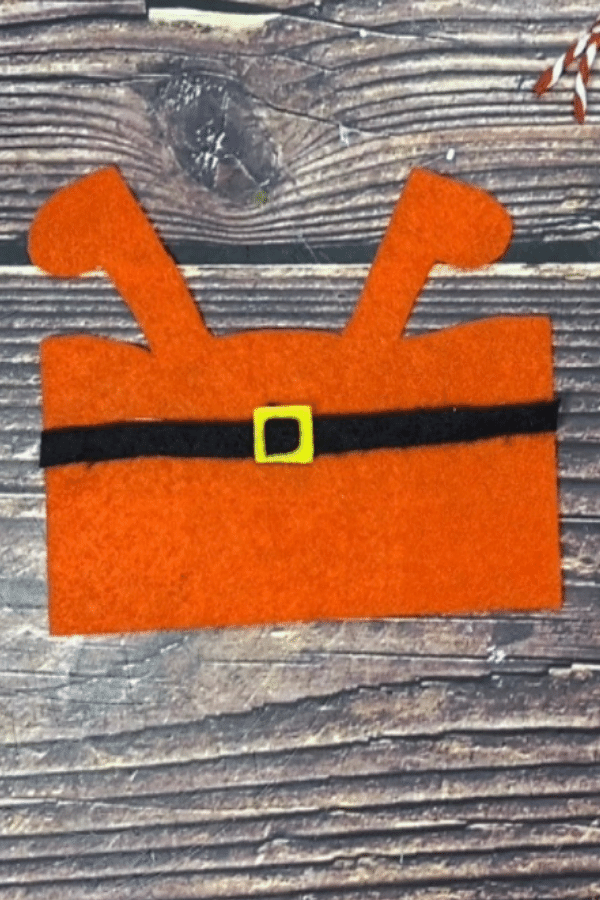
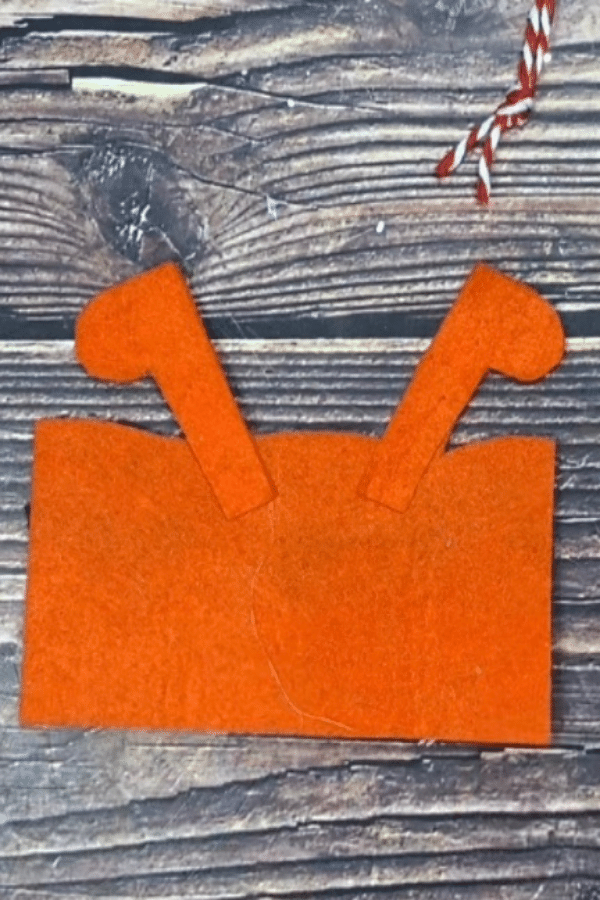
- Print out your templates and cut your felt as per the image below
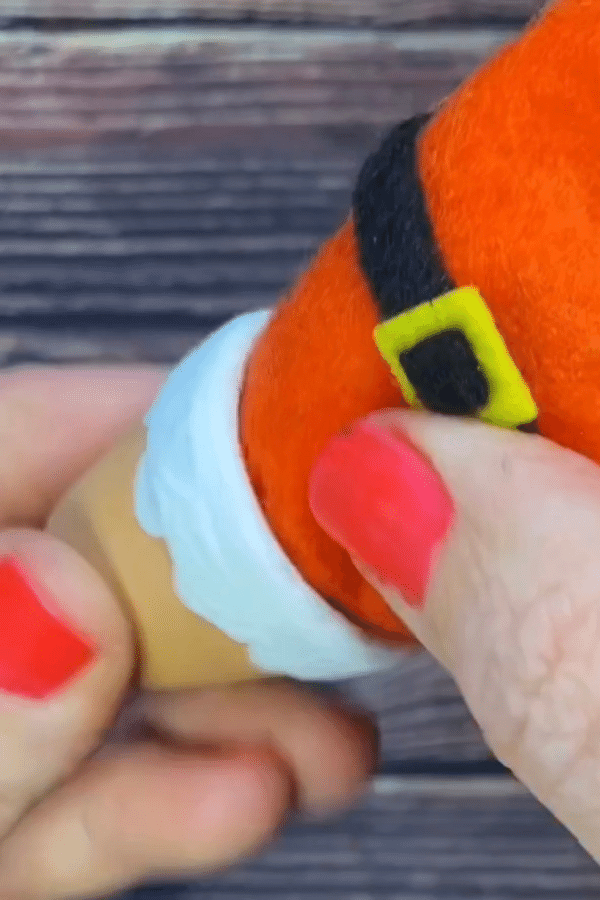
- Use hot-glue to attach the belt and glue the yellow buckle on top followed by a small black square for the inner buckle.
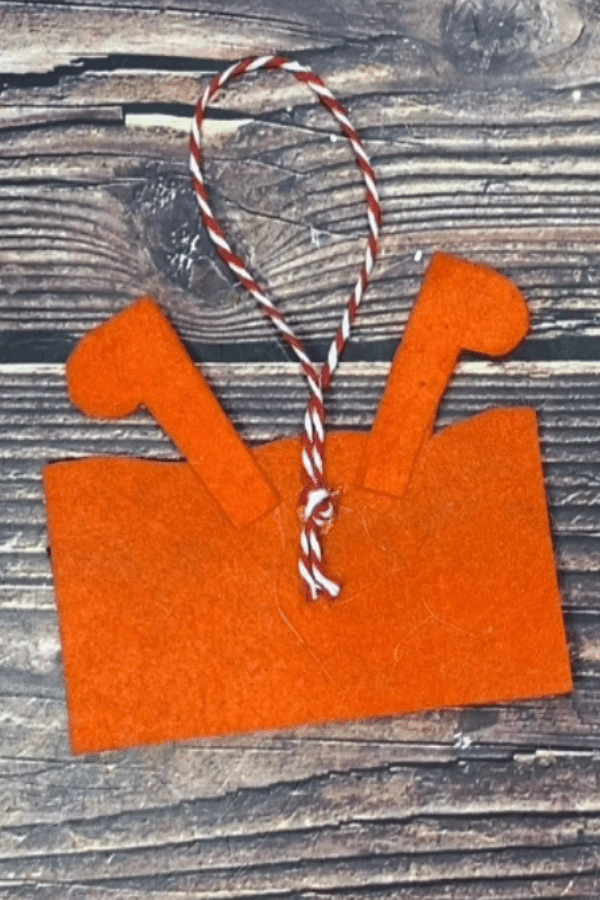
- Turn the piece over so the belt is facing down and glue the leg reinforcements into position as shown...
- Cut your festive string to your desired length (approx 10 inches) bring the ends together and tie a knot. With the belt still facing down, secure the string to the piece using hot-glue as shown...
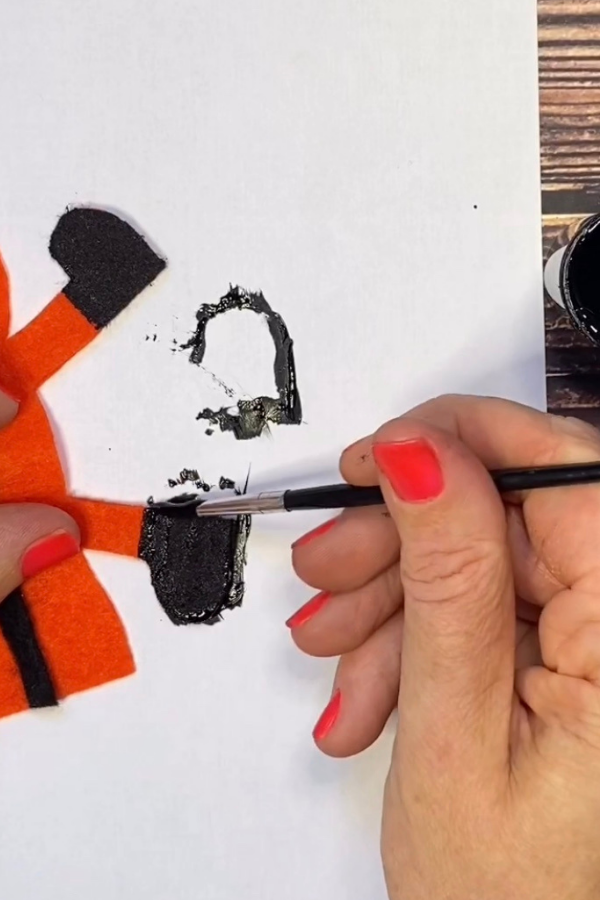
- Paint the boots on both the front and rear of the piece
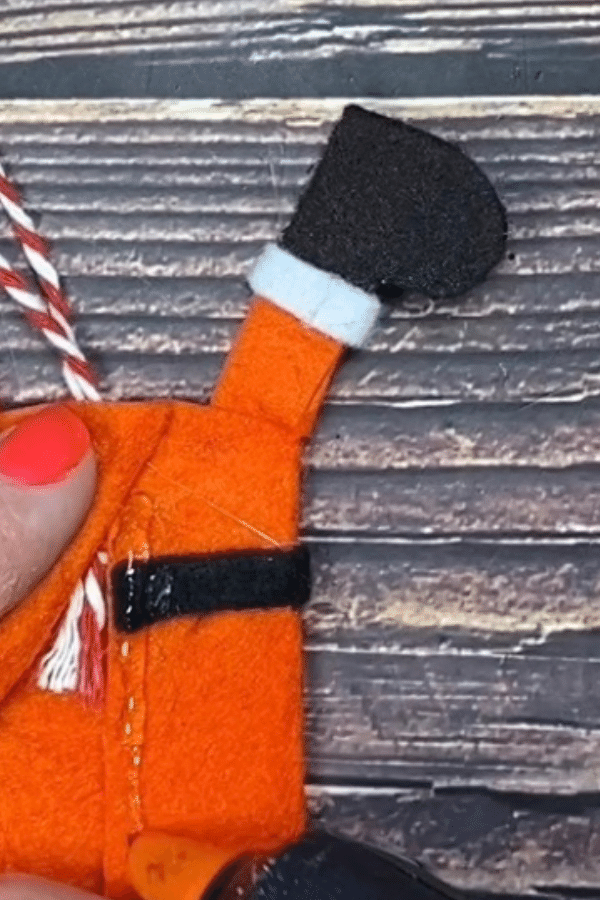
- Once the paint has dried, secure the two boot trims to the piece starting at the front and ending on the rear of the piece as shown...
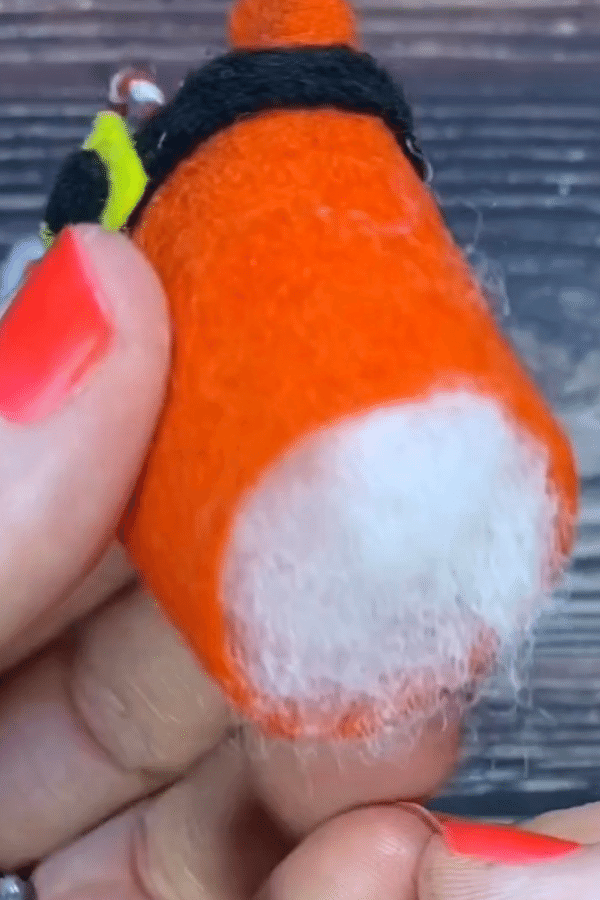
- Now it's time to glue up the body. With the belt facing down, fold one side over and glue along the line where the leg meets the body. Repeat for the other side and then join the two sides together. You should be left with just one opening which will be used to fill Santa's Belly
- Fill with toy stuffing (there's no need to glue up the edge as this will be placed inside the pot)
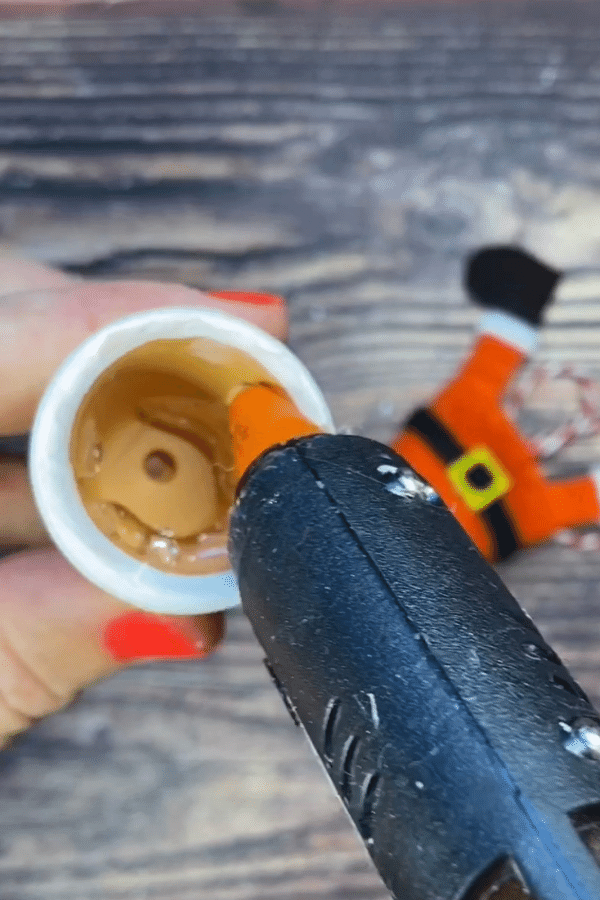
- Line the inside of the pot with hot-glue
- Squeeze Santa's giant belly inside the pot and then hang proudly on your Christmas tree!


Notes
Use gloves and exercise caution when using a hot glue gun as they can burn fingers.