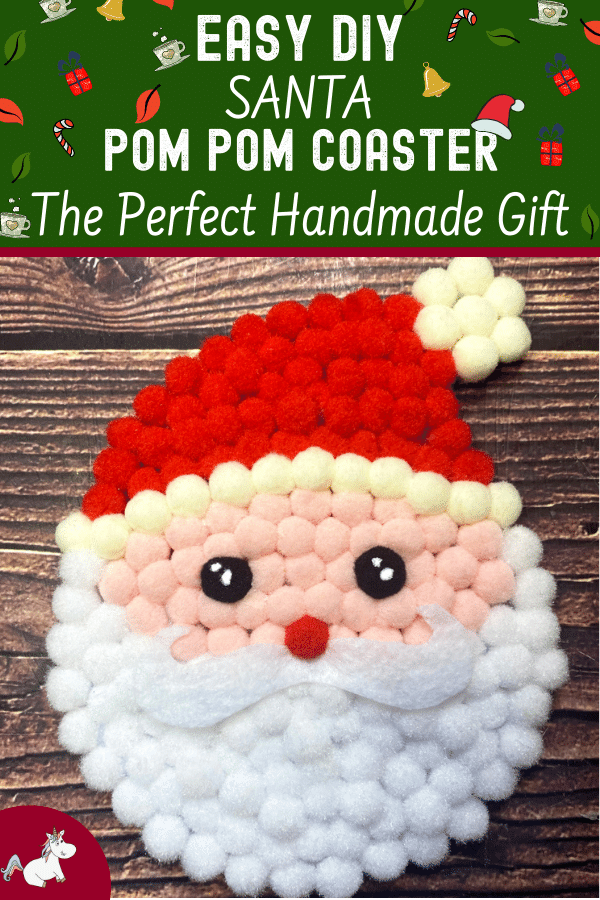
Looking for a last-minute Christmas craft? This Santa pom pom coaster tutorial is perfect!
With just a few materials and a little bit of time, you can create a festive coaster that will brighten up any drink.
And best of all?
This project is part of our Christmas pom pom coaster series – so you can have your very own set of adorable coasters this Holiday season. Scroll to the end to find out more!
Happy crafting!
P.S. Quickly save this adorable DIY Santa Pom-Pom coaster project to your favorite Christmas crafts board on Pinterest by clicking here
This post may contain affiliate links. See my full disclosure here for more info.
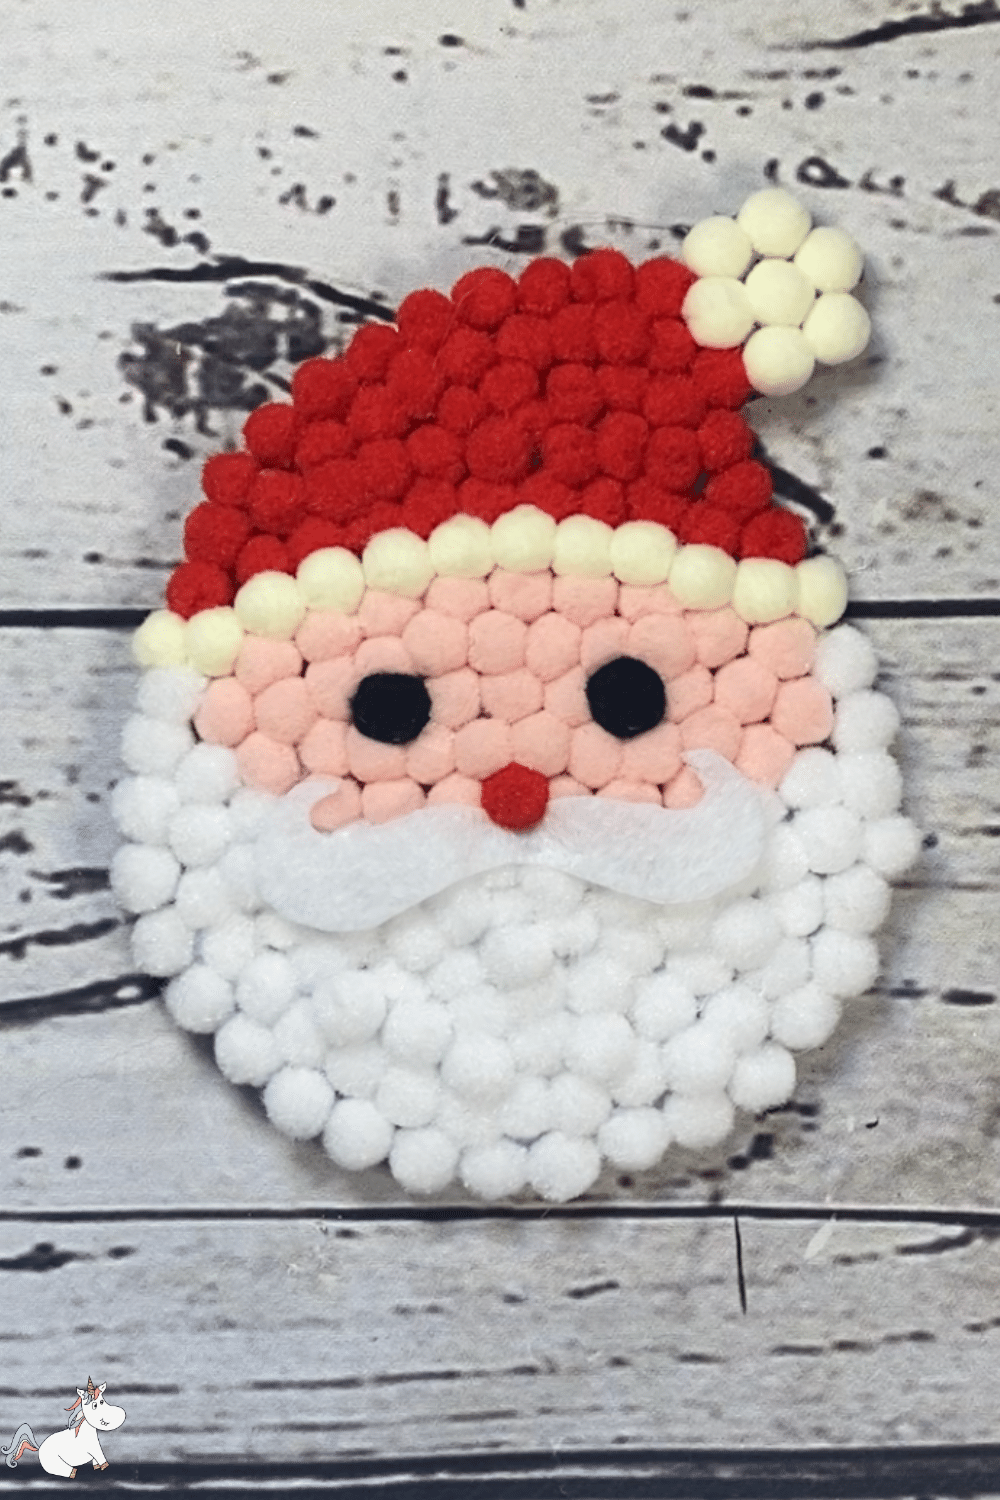
Santa Pom Pom Coaster
DIY Santa Coaster Free Template
First things first, you’ll need to download our free Santa coaster template
To grab your free template simply click here to visit the sign-up page, enter your email and I’ll send you the link and password to the member’s library. If you’re already a member then just click here to visit the library and enter your password.
Once you download your free template, simply print it out on letter-size (A4 paper) and cut it out.
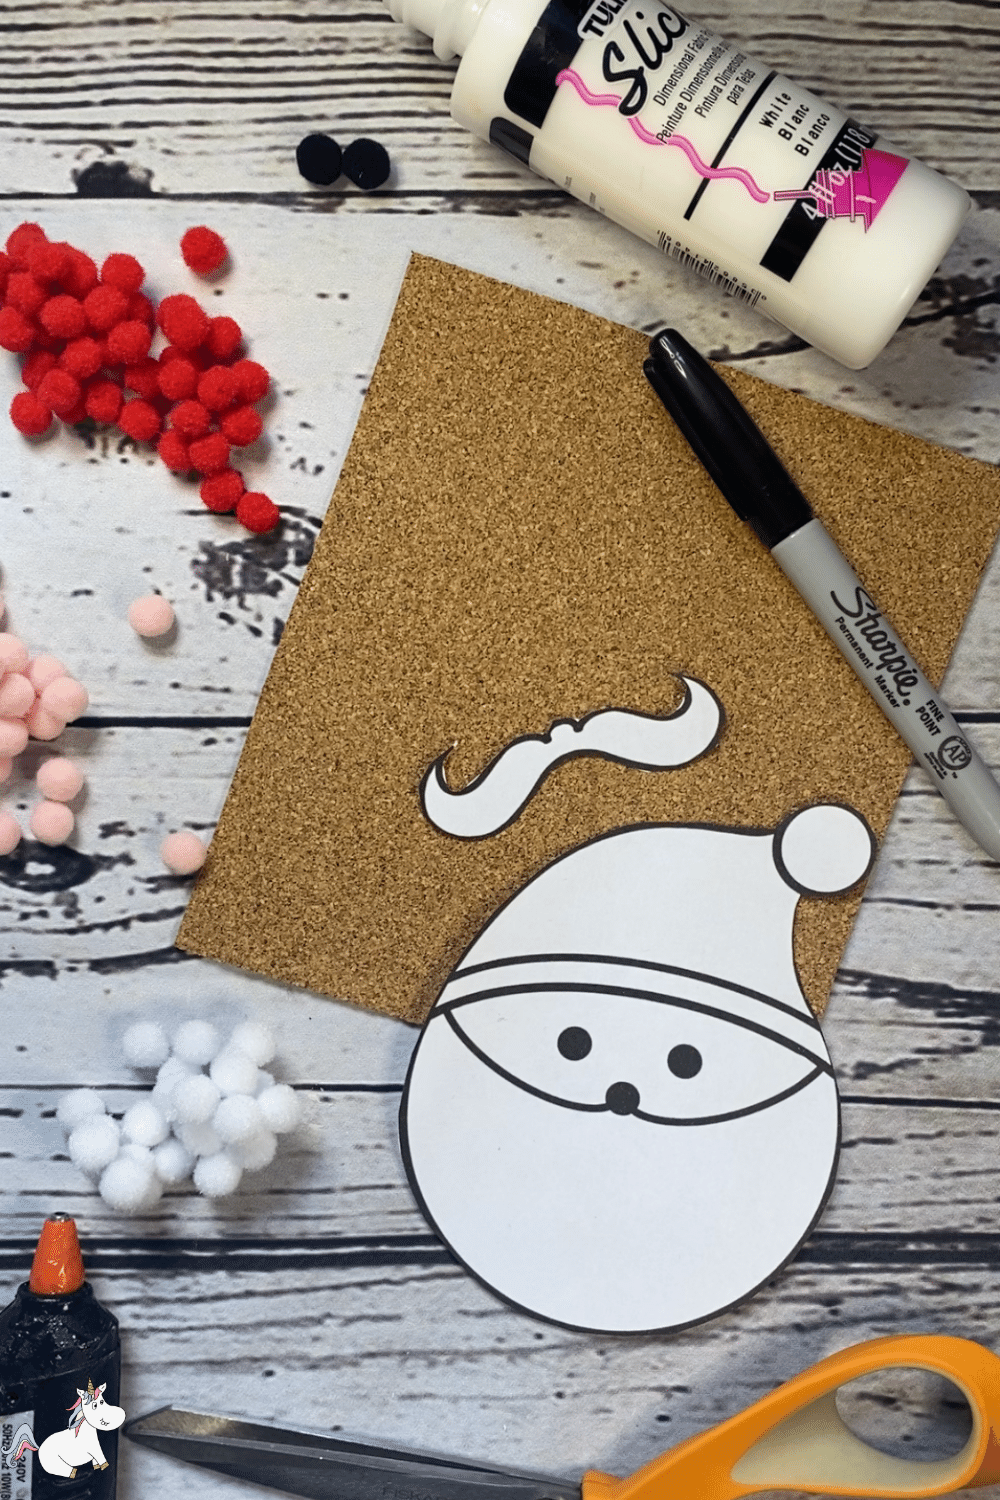
Tools and Materials
Once you’ve got your template, the rest of the materials are all cheap and easy to find…
In fact, you can find everything you need on Amazon!
Making these coasters is very straightforward however a little tip is don’t be tempted to try and substitute the hot glue with school glue!
Why?
Well, we’ve tried that and it simply doesn’t work… the pom poms will just slip and slide all over the place and even when dry they don’t adhere very well.
With hot glue, the pom-poms will adhere super quickly and you won’t believe how difficult (almost impossible) they are to pull off!
TOOLS
- Glue gun
- Sharpie
- Scissors
- Templates
- Printer
- Paintbrush
MATERIALS
- Red pom poms
- White pom poms
- Black pom poms
- Peach pom poms
- Off white/cream pom poms
- White paint
- White felt
- 1.5mm cork sheet
Santa Pom Pom Coaster Method
Step 1
Gather all your materials. Print and cut out your template. You can get your free template from the member’s library by clicking here and entering your best email. Or if you are already a member click here and enter your password.
Step 2
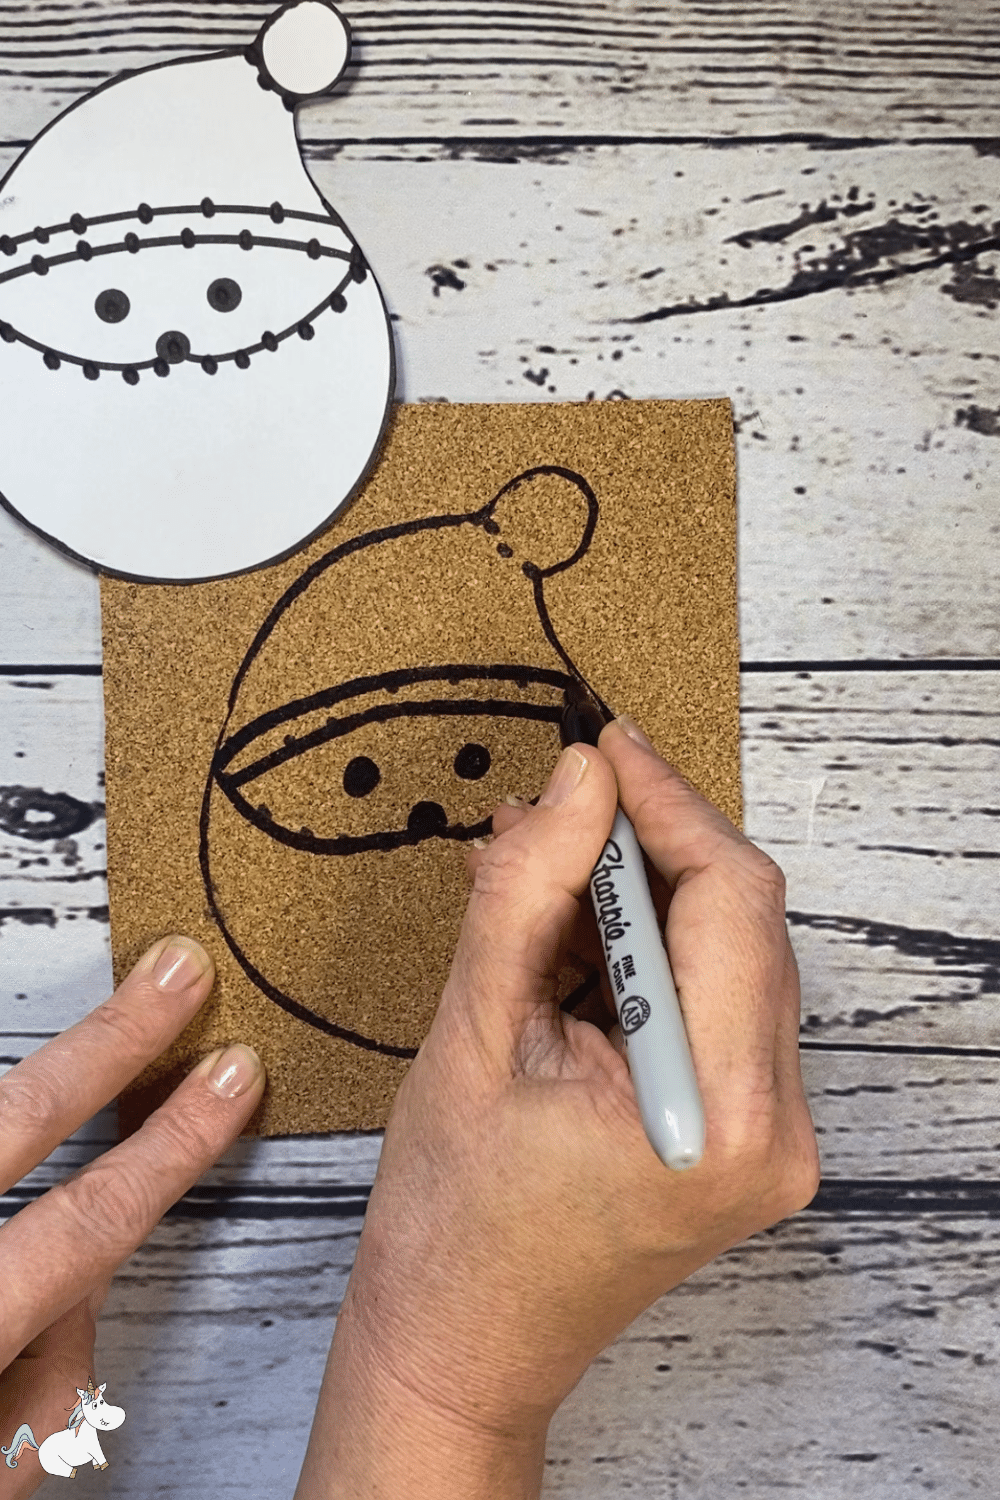
Place your template on your cork sheet and draw around it using the sharpie.
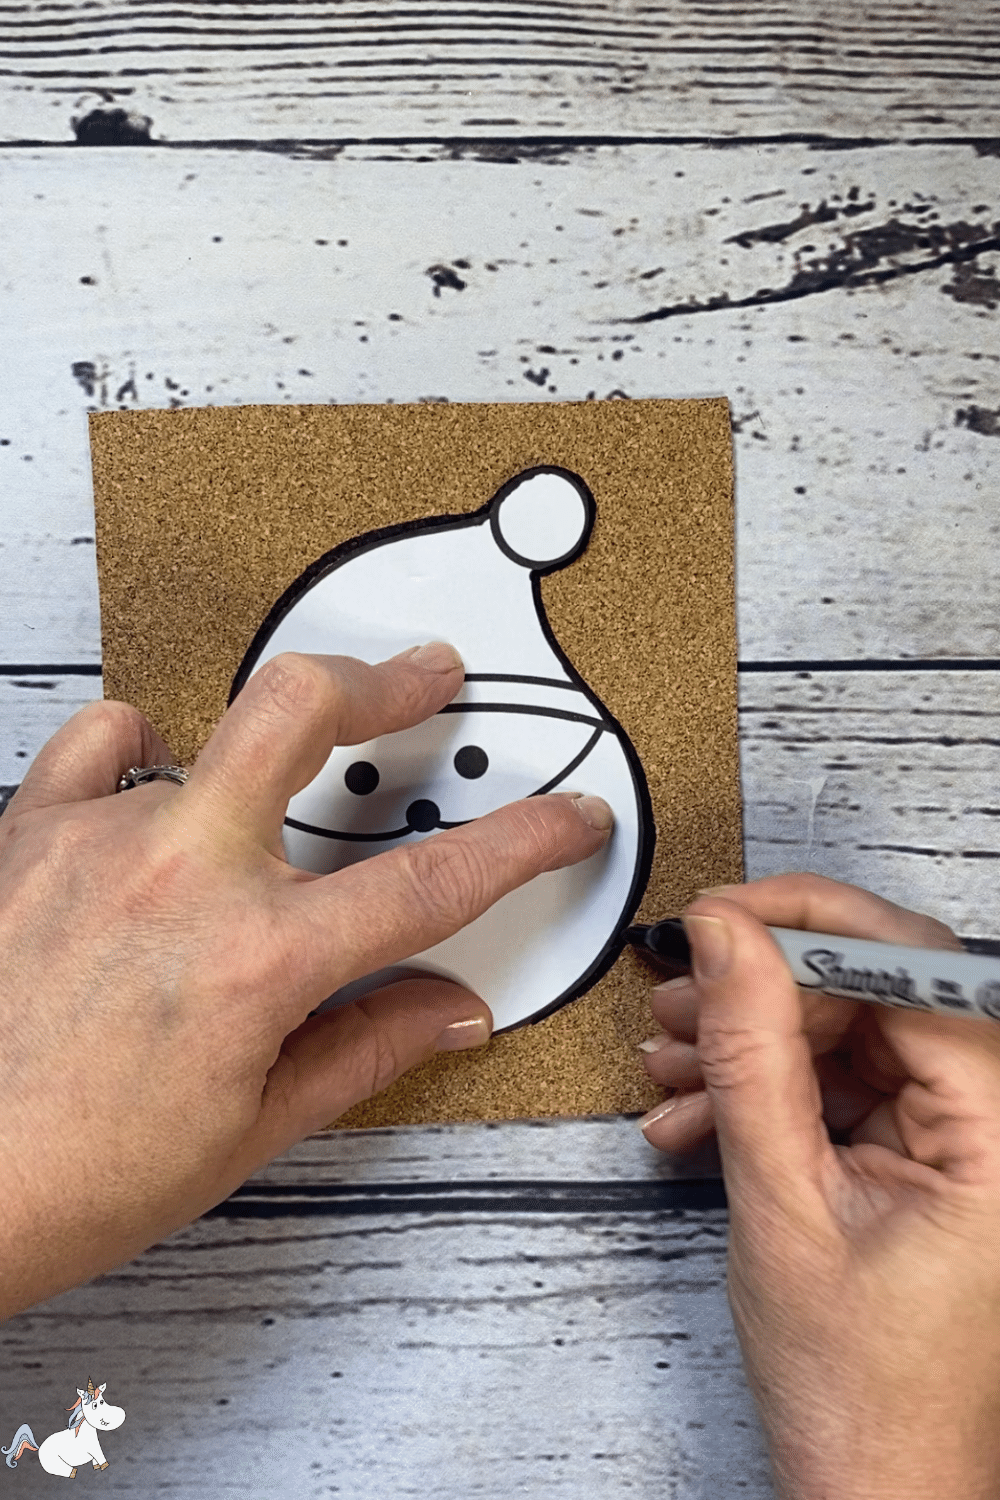
Step 3
Press and hold the sharpie down over the features so they soak through on the cork.
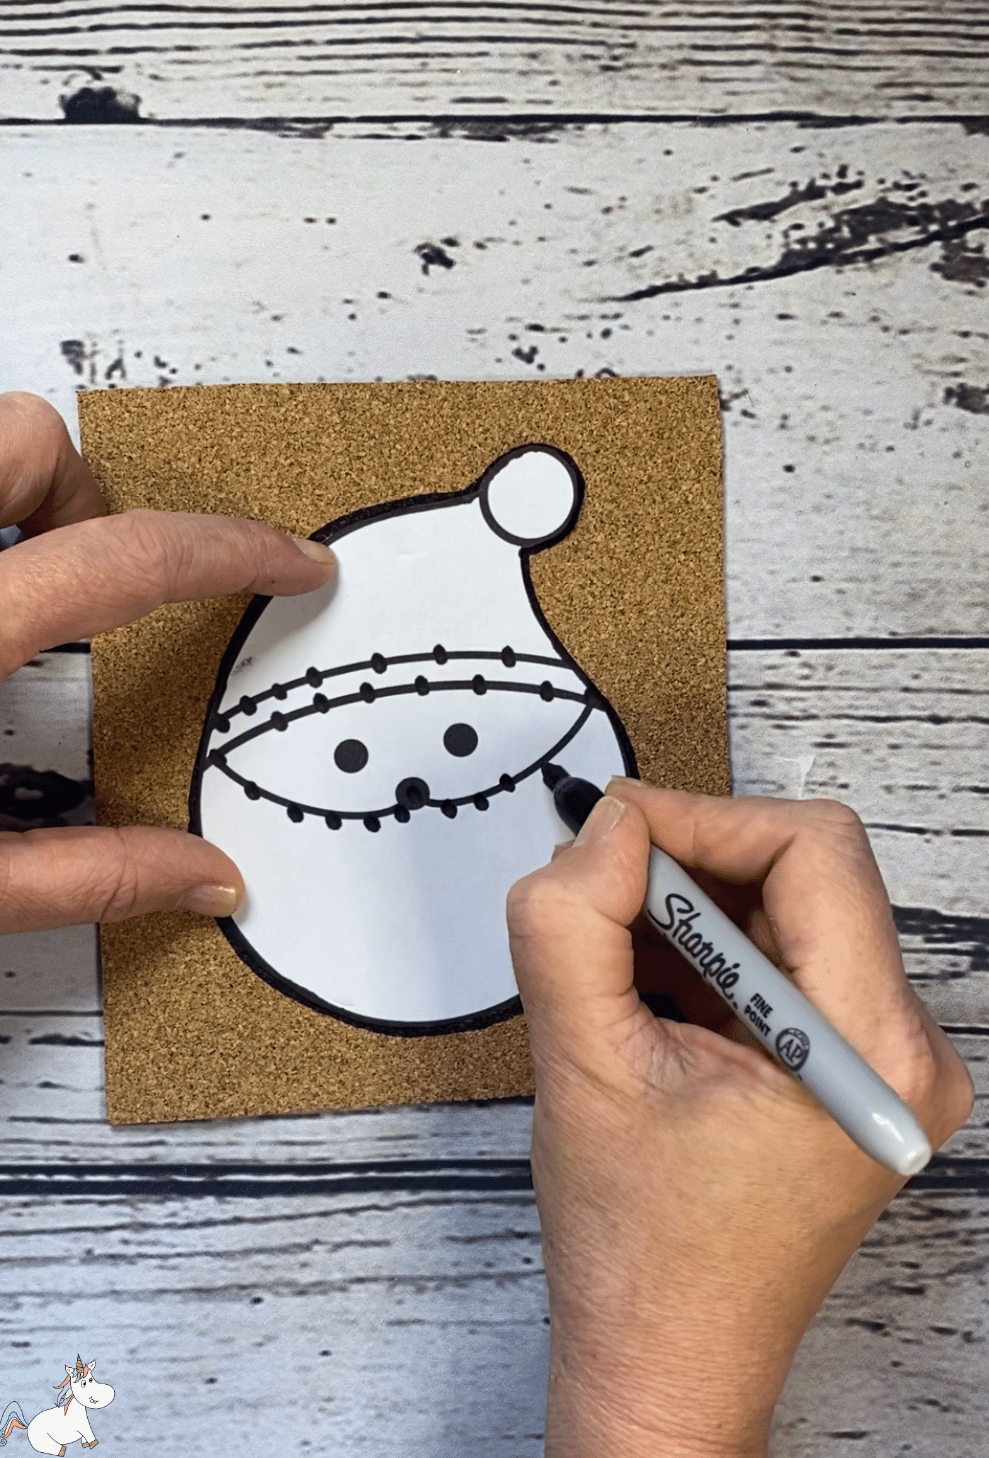
Step 4
Join the dots to create your design.
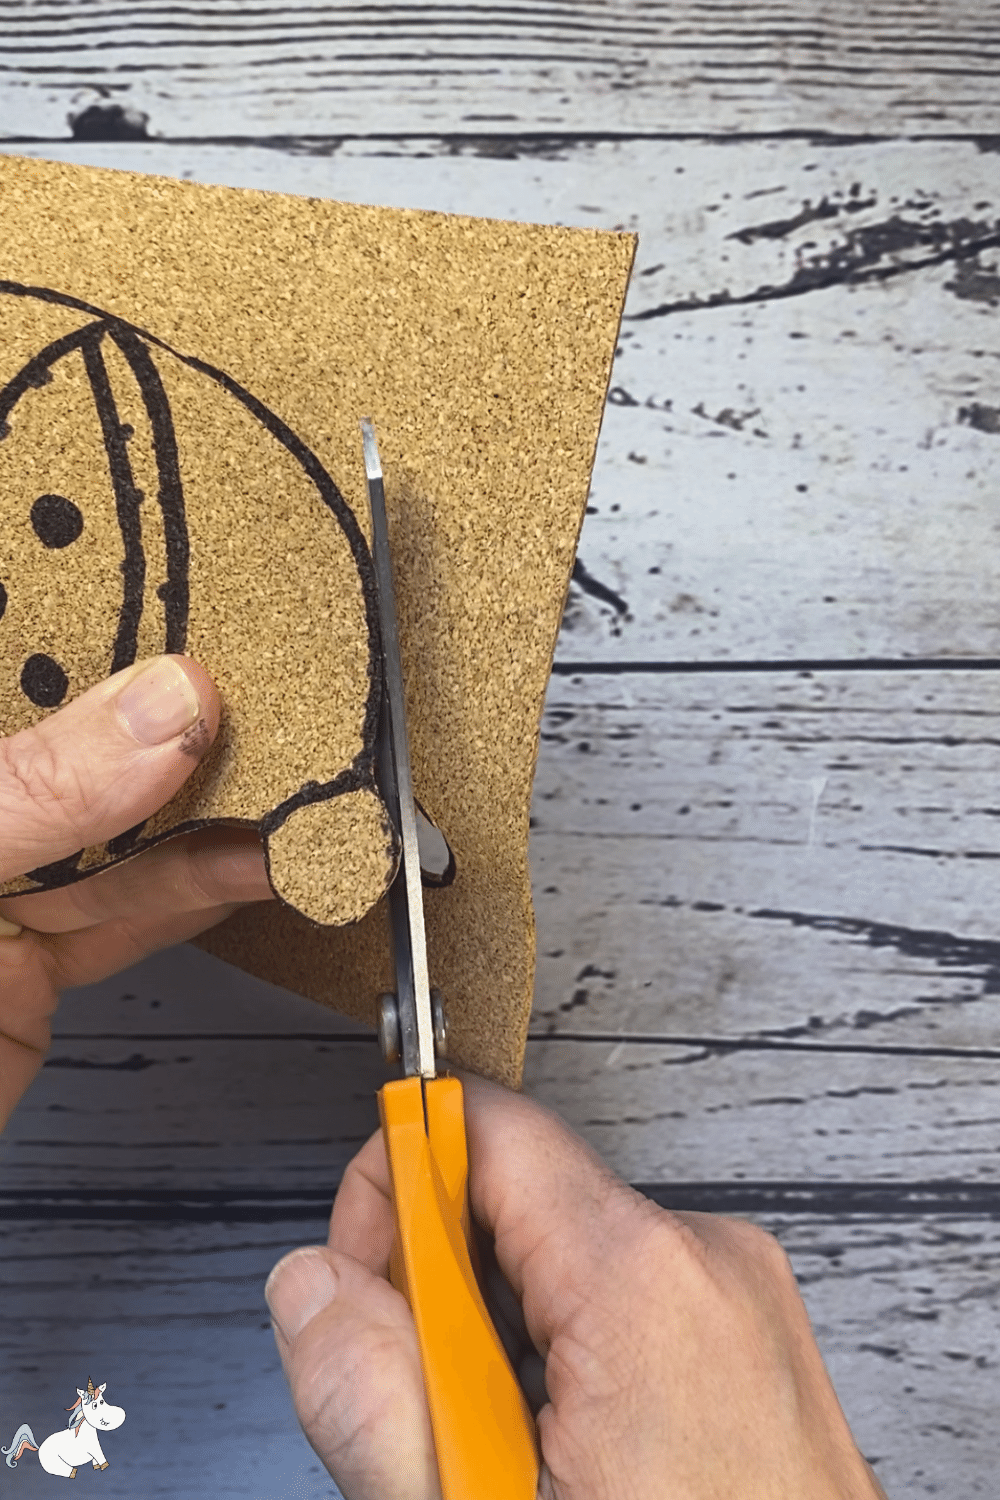
Step 5
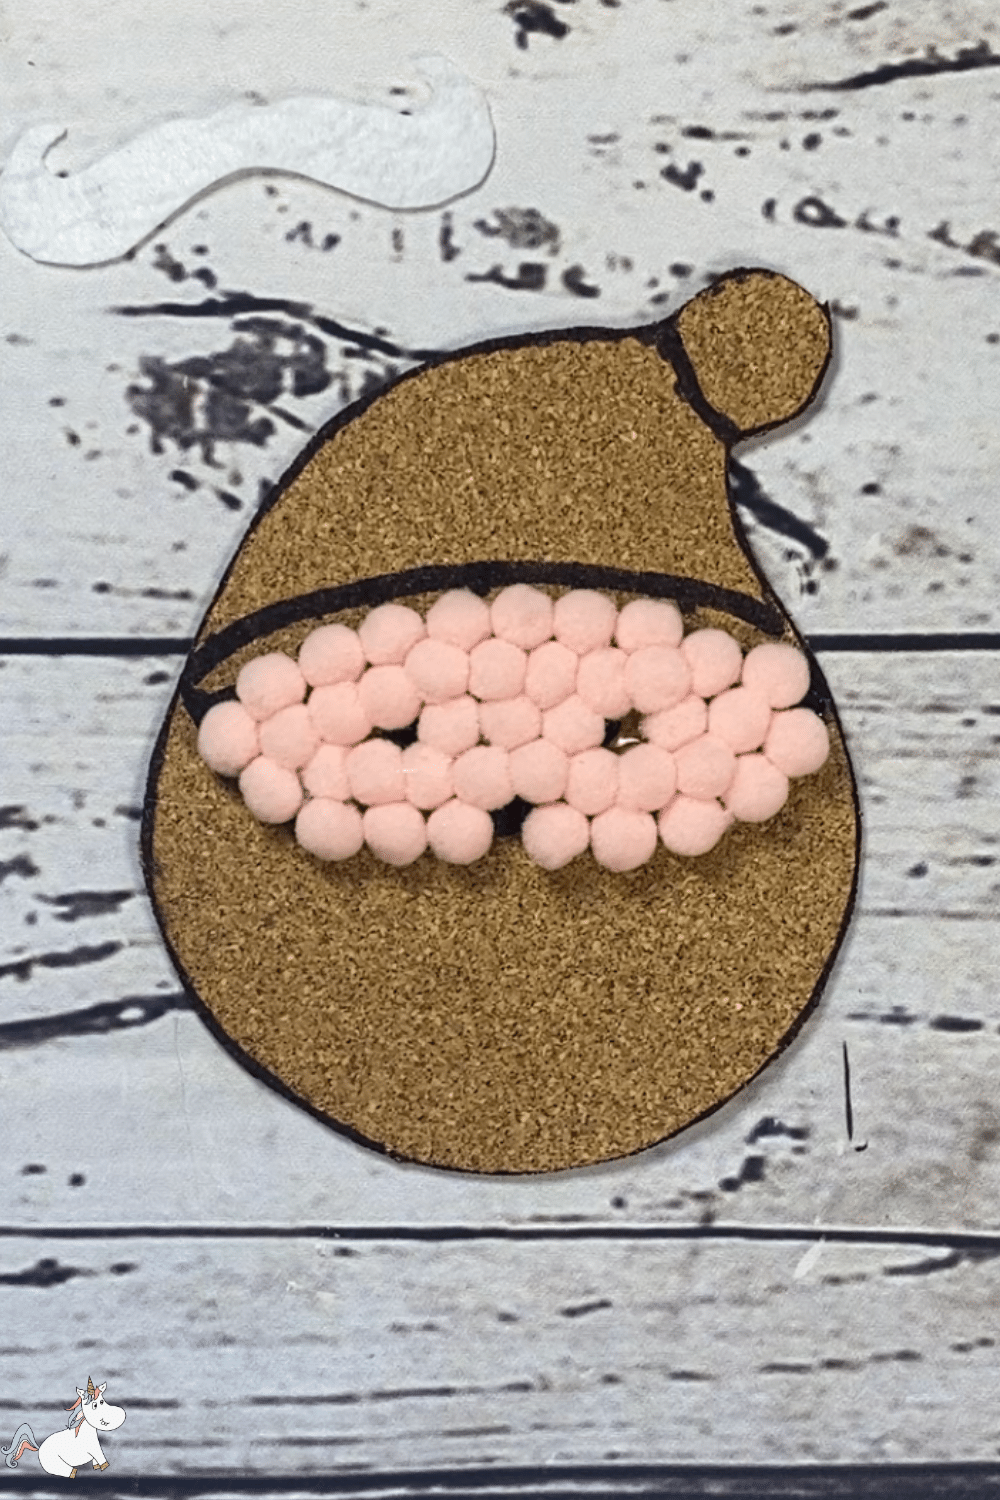
Carefully cut out your Santa shape.
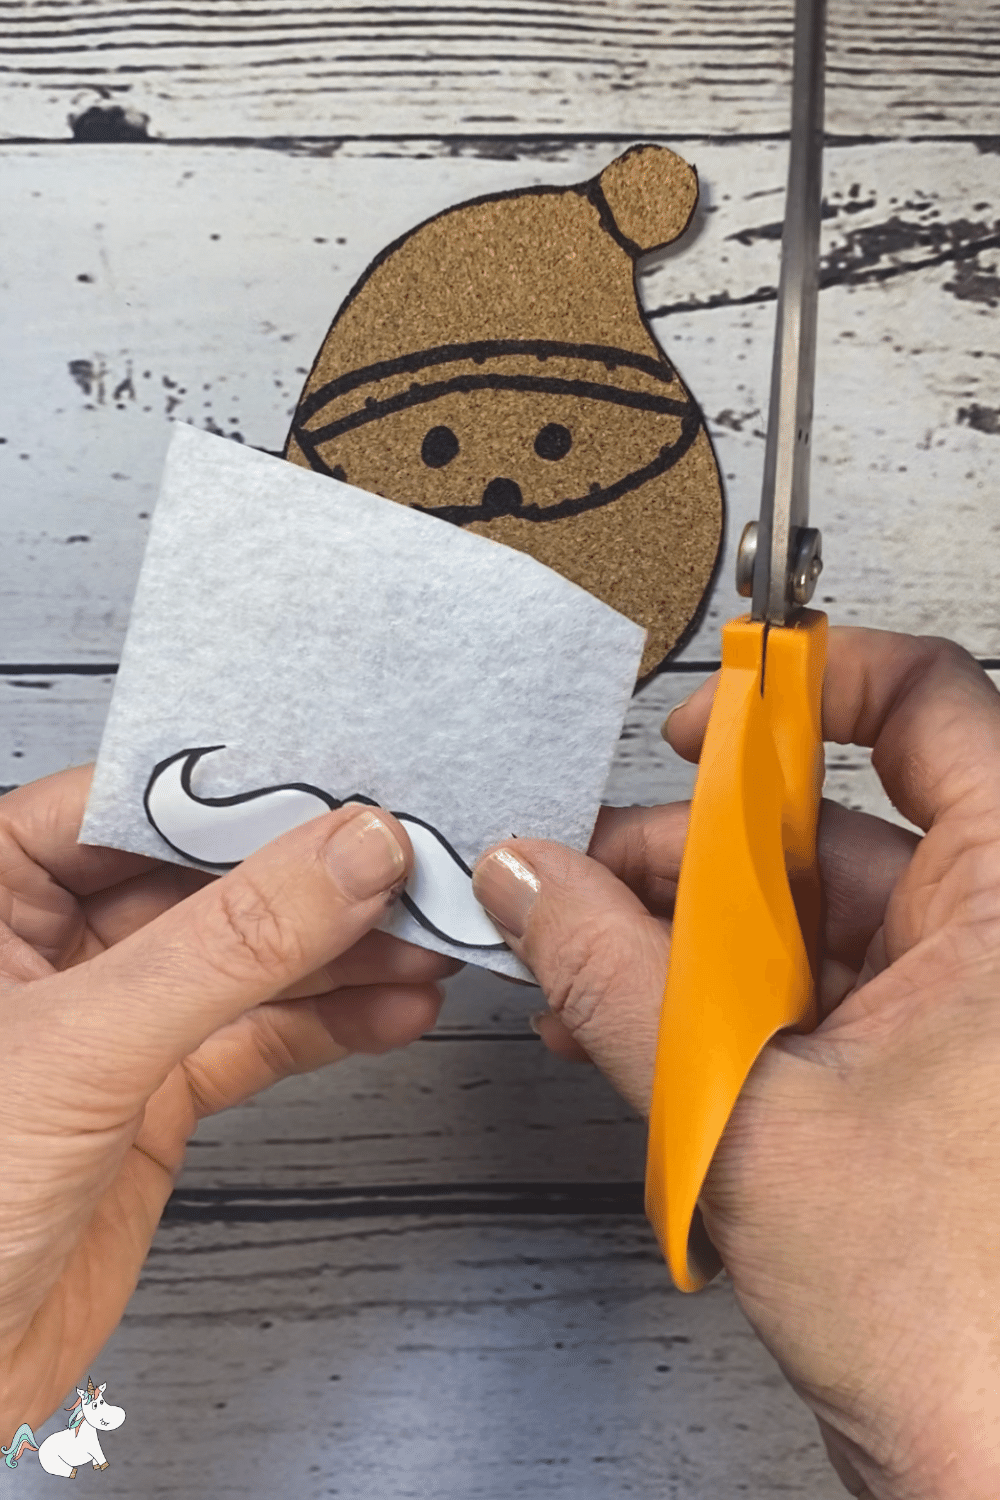
Step 6
Using the template, cut out a mustache for Santa using white felt
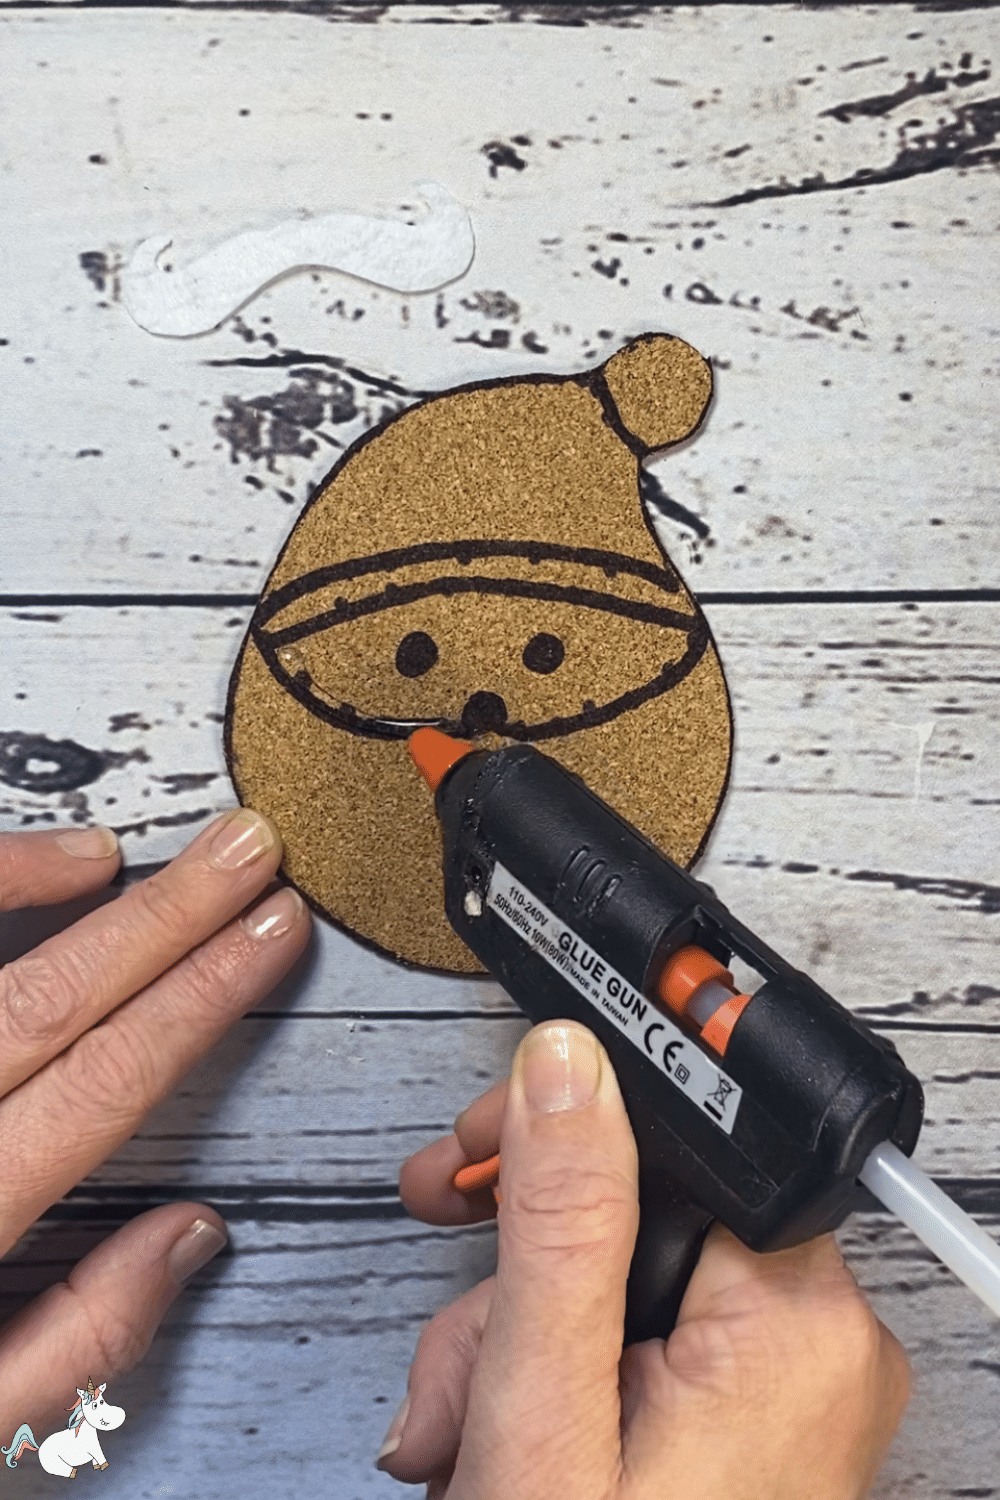
Step 7
Apply hot glue to the face area, a little at a time. Remember to be very careful with hot glue as it will burn your skin if it comes into contact.
Step 8
Gradually apply the peach pom poms to Santa’s face area, leaving a small gap for the eyes and nose.
Step 9
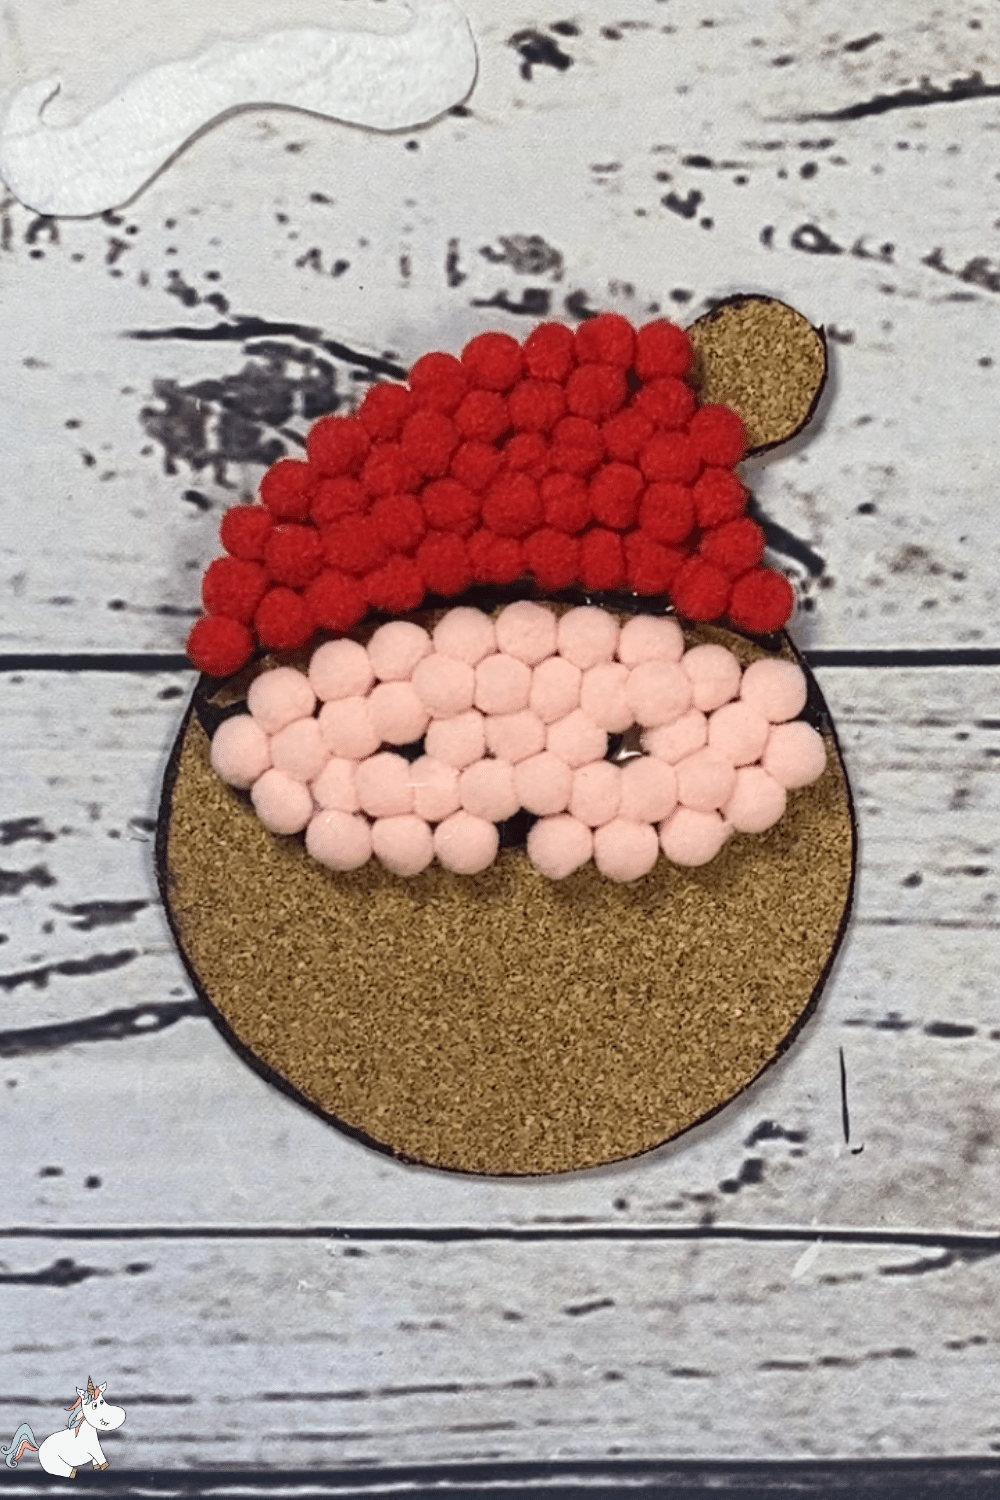
Apply hot glue in stages to the hat area of your Santa coaster and apply red pom poms. Remember to leave a small gap between the face and hat pom poms for the rim of Santa’s hat.
Step 10
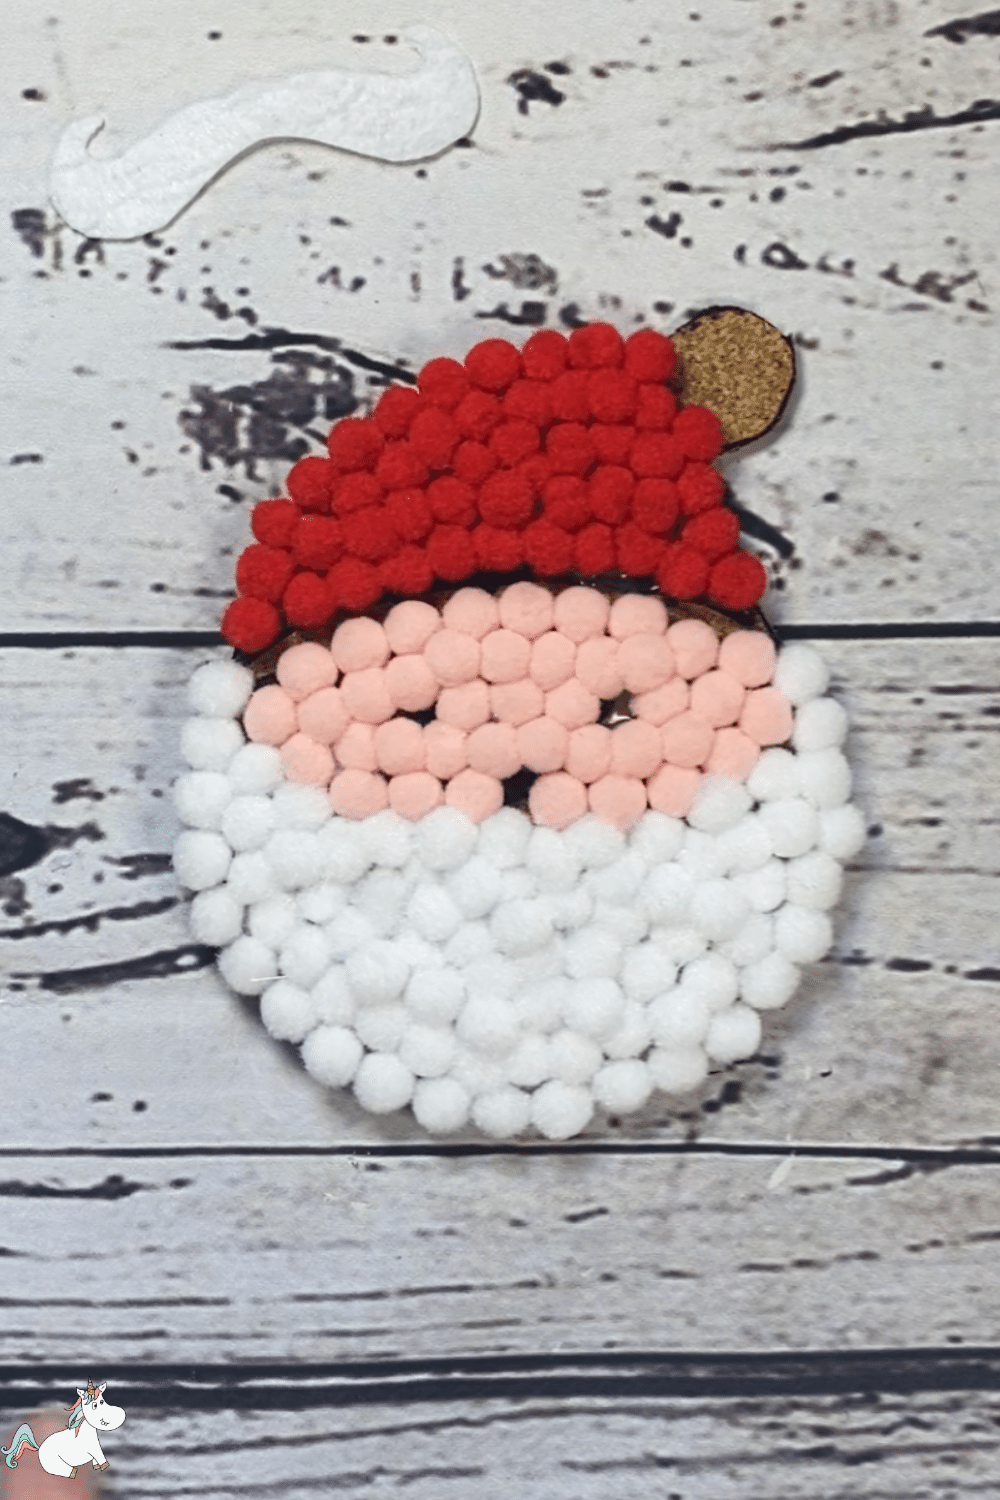
Next, attach the white pom poms to the beard area using hot glue.
Step 11
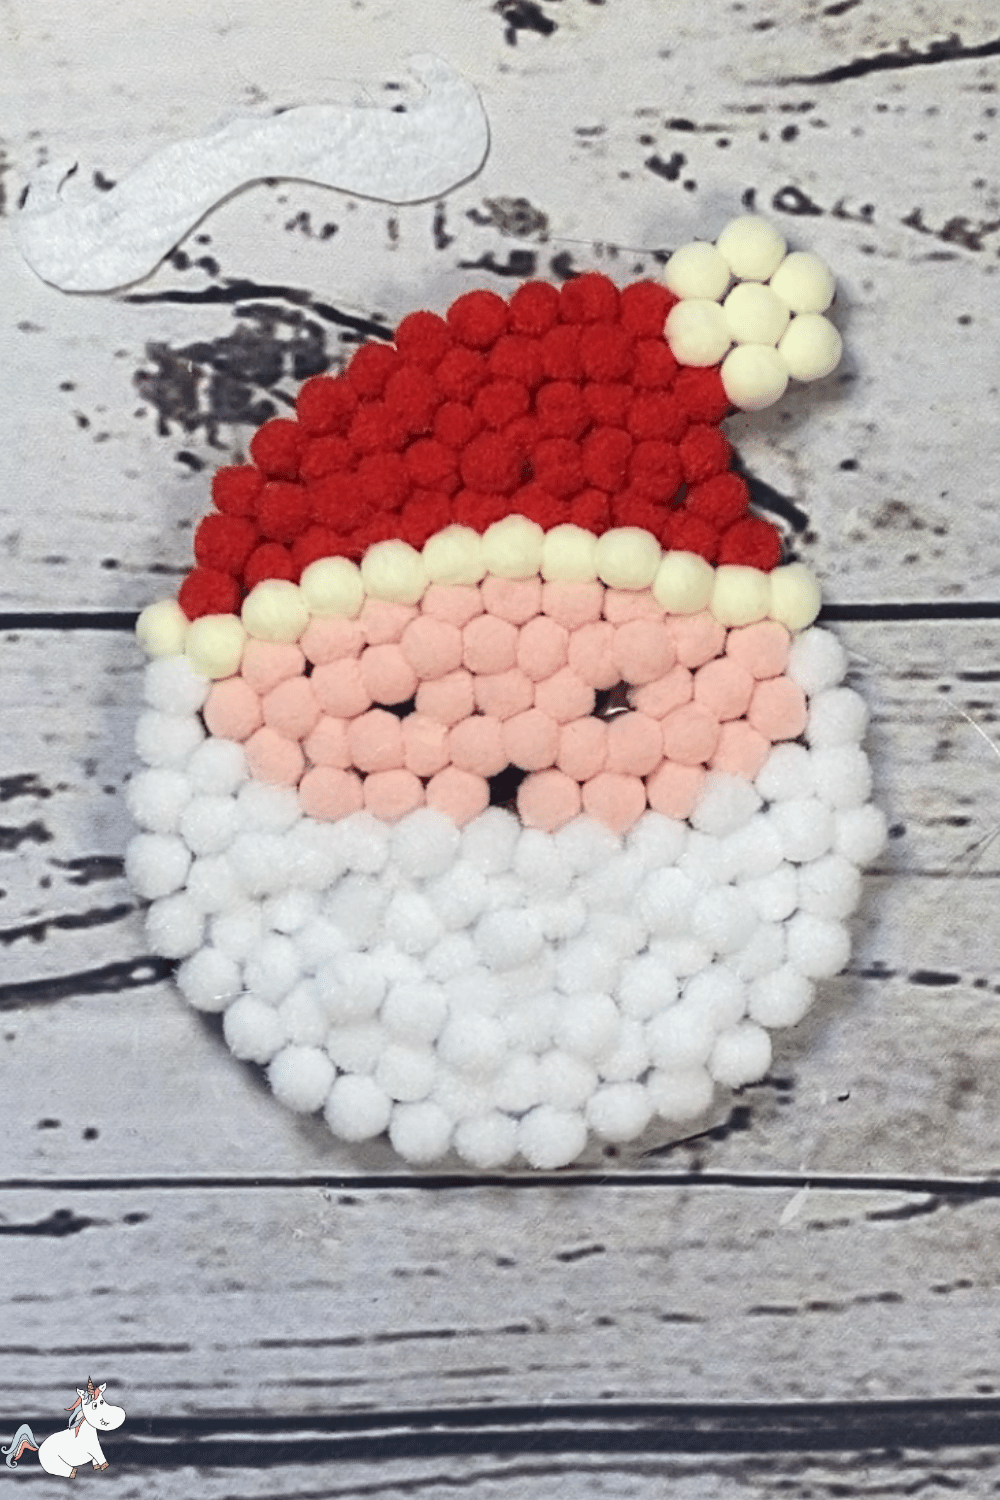
Apply the cream pom poms to finish off the details of Santa’s hat.
Step 12
With hot glue, add the eyes and nose followed by the felt mustache.
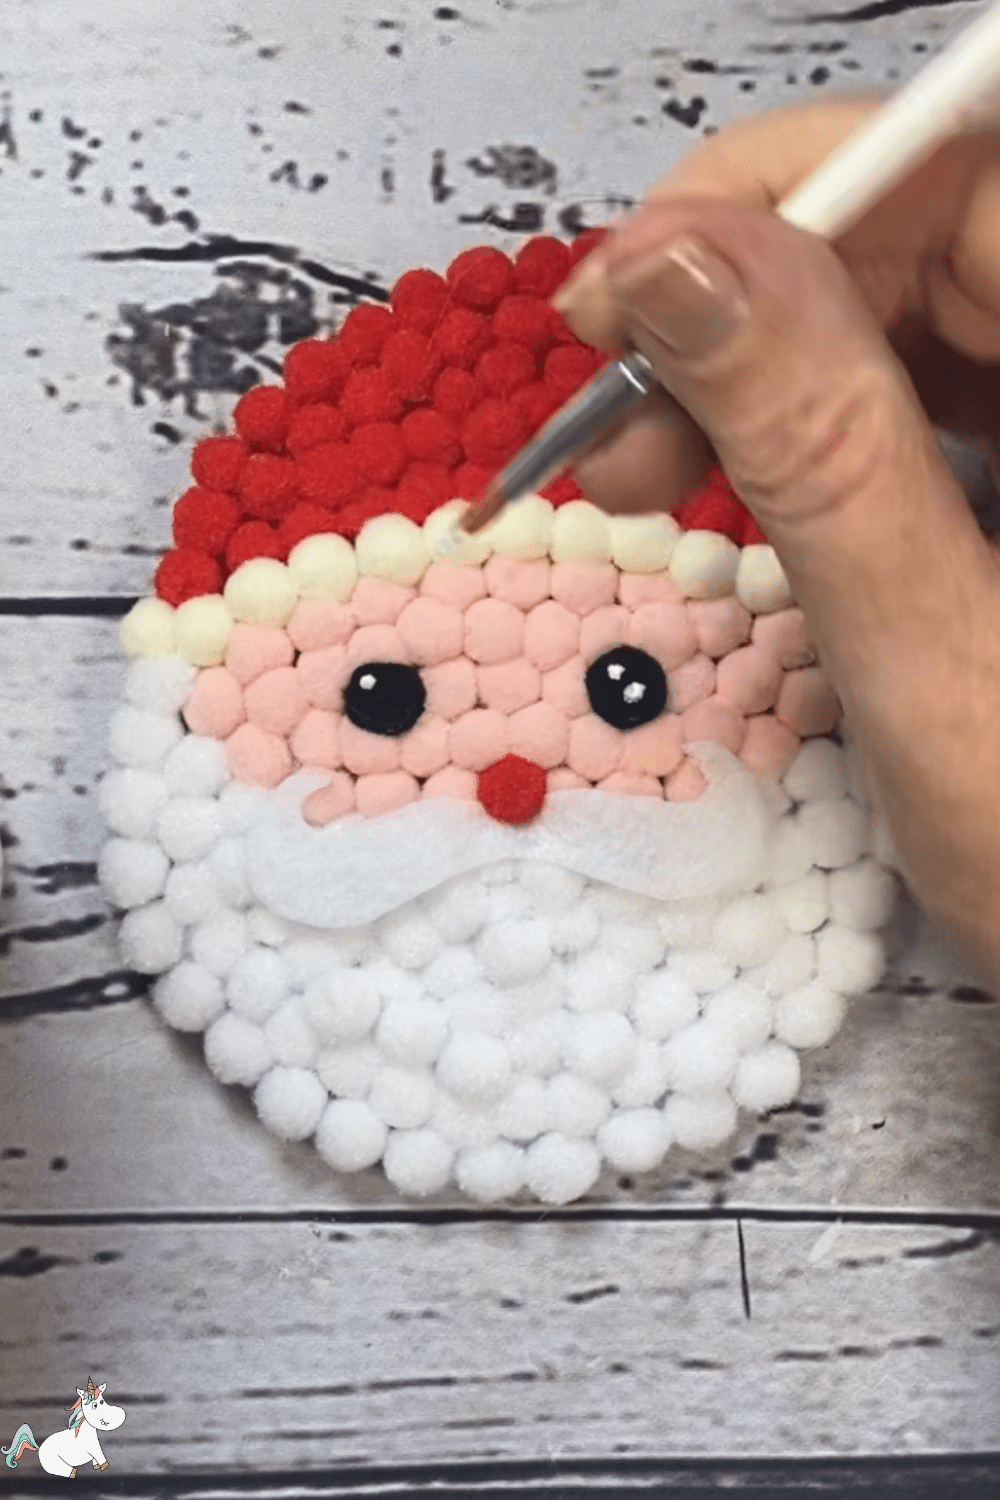
Step 13
Finally, Santa needs a little twinkle in his eye… paint this on with a small brush and white fabric paint.
And you’re all done! Isn’t he adorable?
Before You Go...
Before You Go...
This Santa pom pom coaster is the second coaster in our 4-part series of DIY Christmas coasters…
As you can see, they’re all super adorable so we think you should definitely make them all!
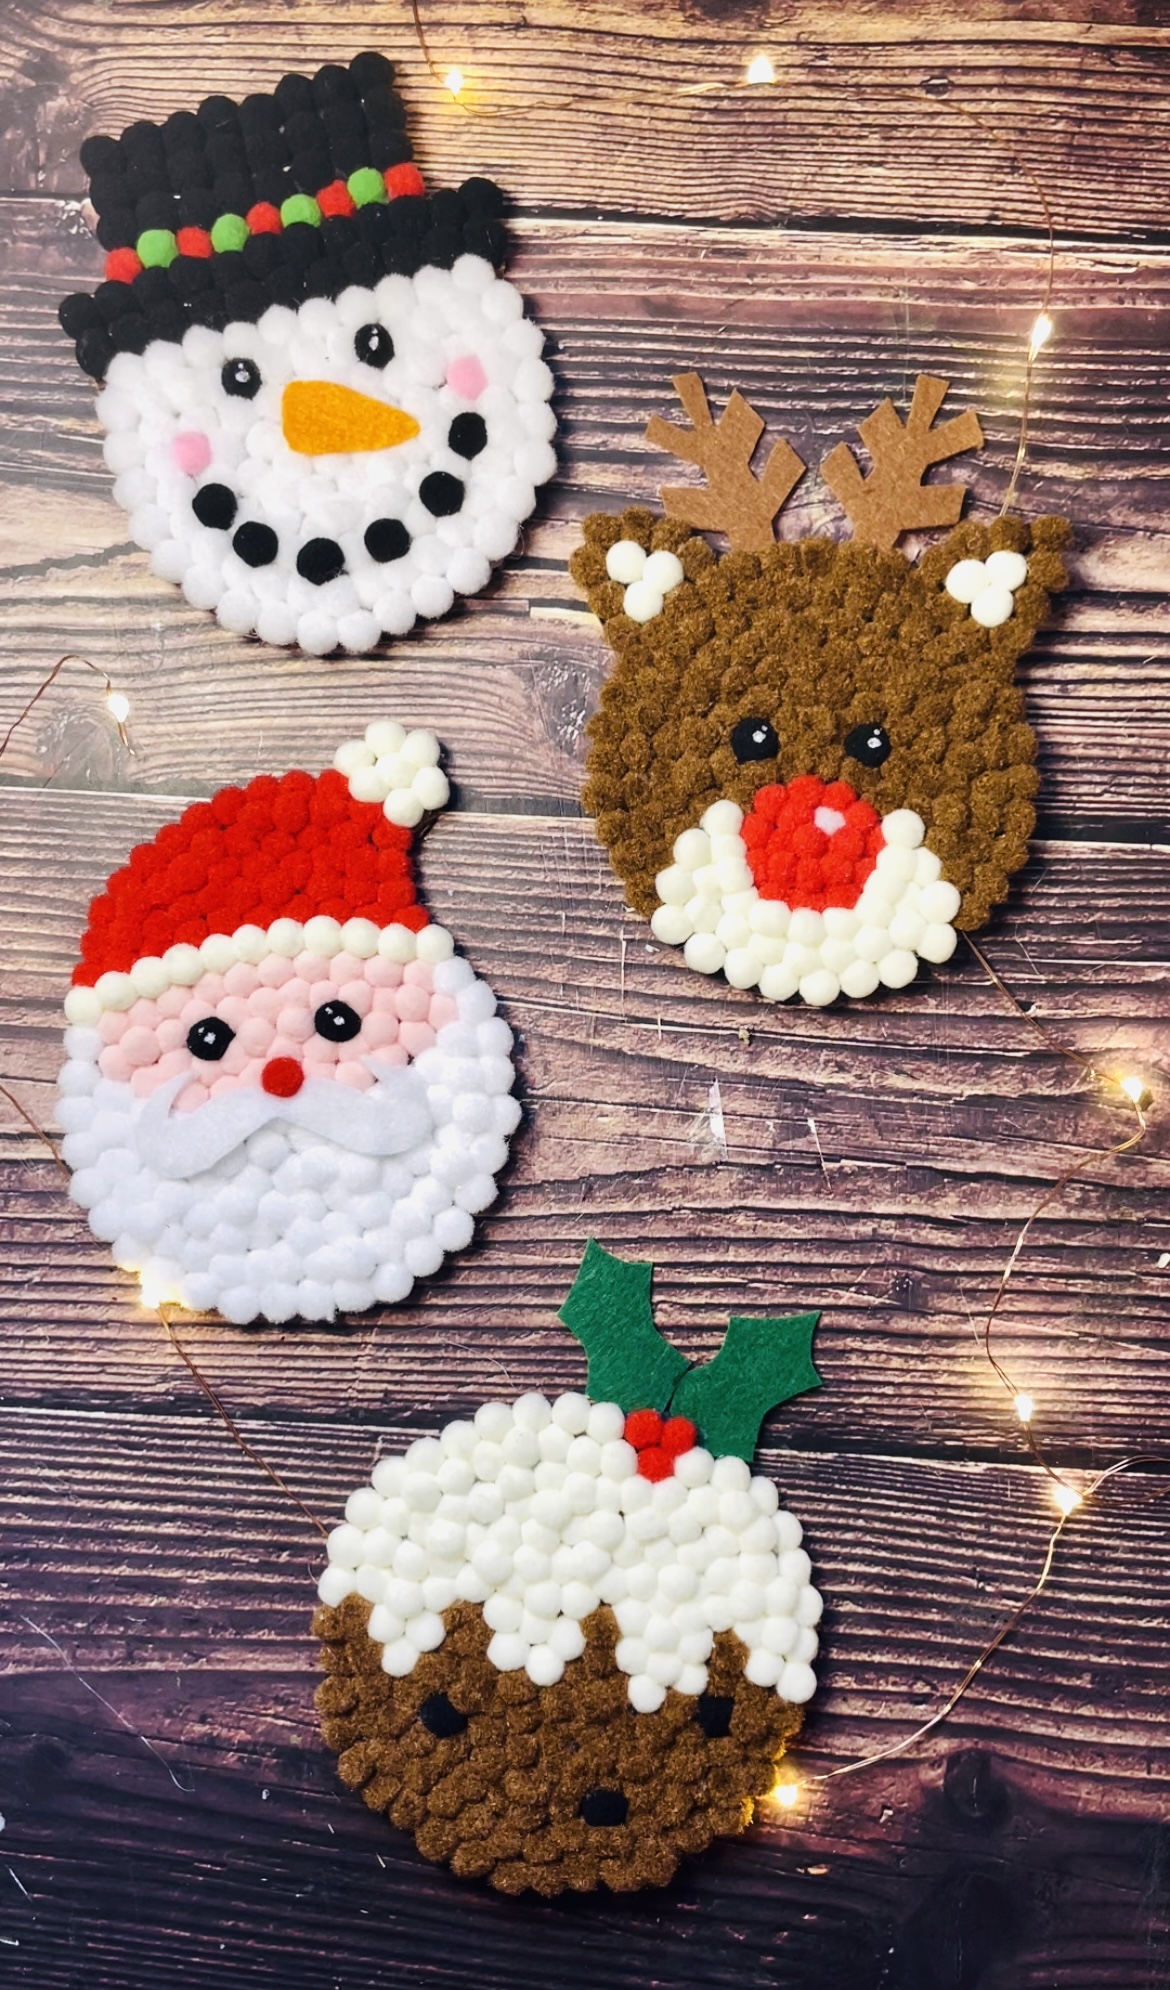
The complete set includes Rudolph, Santa, Christmas Pudding, and Snowman pom-pom coasters!
Don’t you just think they’ll make the perfect handmade gift?
So do we!